A total beginner started to learn electronics with Raspberry Pi
A cigarette-box-size computer Raspberry Pi “bridged” between my knowledge of computer science and electronics. More precisely, RasPi made me one of zombies that crowd around circuit boards and connectors. LOL
When I was reading a computer magazine, one article caught my eyes. The magazine says a computer is sold just for $40, and it has connectors called GPIO (General Purpose Input / Output) that can control other electronic devices.
RasPi is a computer developed for education. It has a CPU, memory, LAN connector, 2 USB ports, and an HDMI port. You can use your TV as a monitor. RasPi doesn’t have a HDD, but it can use an SD card as HDD. You can install Linux to the SD card. Linux is desktop-based, so that you can use a mouse and use the Internet. What I was surprised was the price comparing to what it has! Can you believe you can buy a brand-new computer which is perfectly modern (because you can use a USB keyboard and a mouse, and connect to the Internet) just for $40?
I have used computers for a lot, but I’m completely new to electronics. I had no connection to geeks crowding around weird electronic components and junks in Akihabara. Honestly, I couldn’t understand why they crowd circuit boards and connectors. I couldn’t understand mathematics and physics, so I couldn’t understand what electronic current, voltage, resistance, and Ohm’s law are. Even I was that idiot, I went to a university of science because I wanted to learn computer. I really had problems there. I failed most of mathematics and physics and had to take most of classes twice.

Akizuki, one of the most famous electronic components stores in Akihabara.

Sengoku, another famous electronic components store in Akihabara.
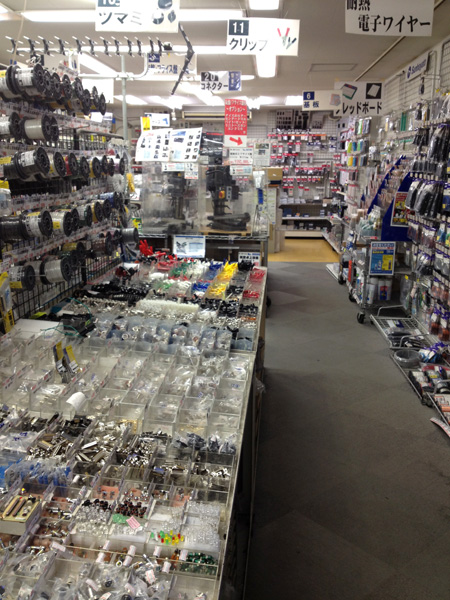
An electronic components store in Akihabara. Can you tell which is which?
RasPi bridged between my knowledge of computer science and electronics. More precisely, RasPi made me one of zombies that crowd around circuit boards and connectors. LOL
Now let me report RasPi. I picked up information that I couldn’t find many on the web.
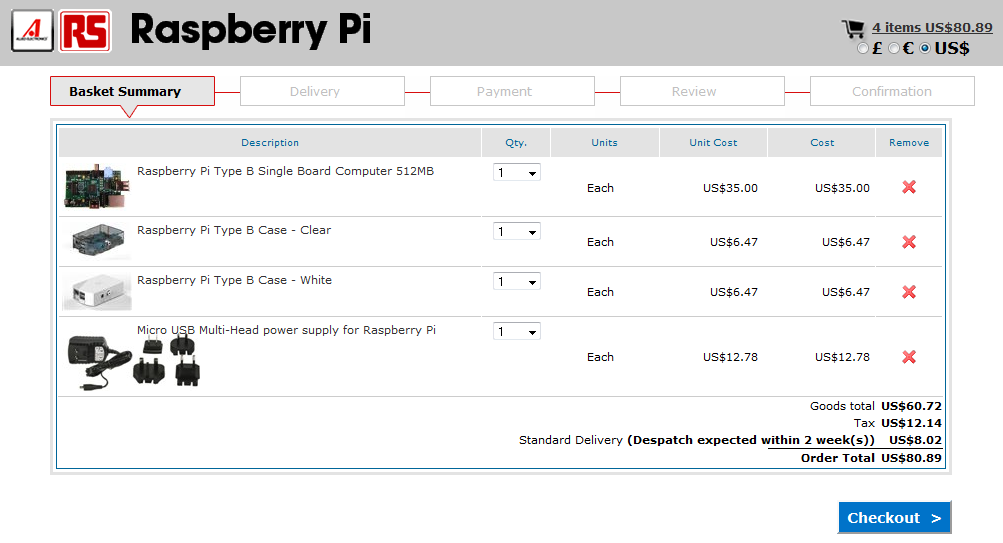
I bought RasPi at this store and it arrived without problems.
Raspberry Pi store from RS Components (http://raspberrypi.rsdelivers.com)
There are stores on the streets or on the web in Japan, but the prices look higher around 2,000 yen. [Jan 11 2014 Update] There are some stores which have Raspberry Pis in stock in Akihabara, and prices are about the same or even cheaper. See Where to buy Raspberry Pi in Akihabara?
This is what I bought.
I recommend you to search how to make a boot SD card and buy it if you are not sure what to do. AC adaptor is an 5-volts-2-amperes with a Micro USB connector. I bought this because I didn’t know what to get, but I have learned I could use compatible adapters.
You should buy a case. Many people use RasPi without case, but I don’t think it is a good idea. Case is not just for design and protection against dust and damage. When your program or electric devices don’t work, you don’t need to verify if your RasPi is broken or not. Be noticed that RasPi’s power LED is on its circuit board and can be seen only through a clear case.

RasPi was shipped from Germany, not from United Kngdom.
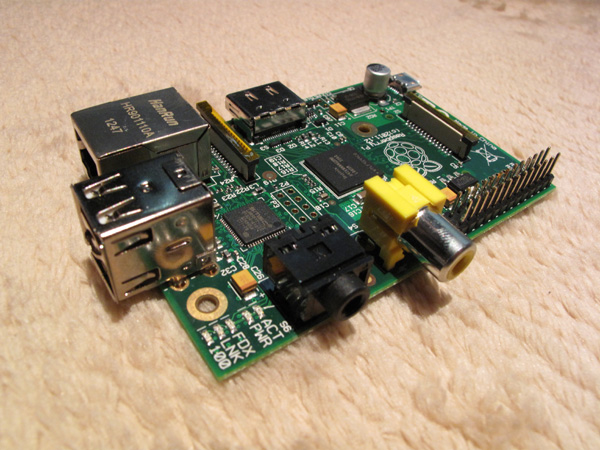
Raspberry Pi

You can use a smart phone battery too. I can’t believe a computer works with a battery! But RasPi may turn off depending on how much your USB devices use electricity. My WiFi adapter didn’t work. You may take one of these ways: give up using WiFi adapter and use the built-in LAN, or give up using battery and use an AC adapter and WiFi adapter, or improve or change battery.

Raspberry Pi on boot (CUI)

Raspberry Pi on boot (GUI)
I tried to follow Nikkei Linux March 2013. First of all, I tried to blink an LED.
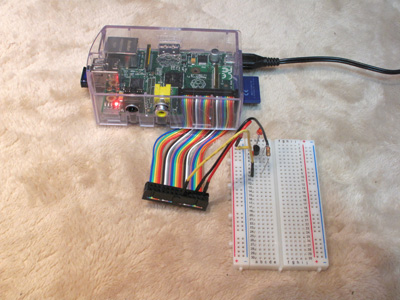
The magazine uses RasPi without a case and uses solder. This is not easy for beginner like me. I wanted to use RasPi with a case and pull GPIOs outside. I went to a in Akihabara and asked what I should do. They showed a set of flat cables and even made a terminal.
This is what I had first.

This was a good idea, but RasPi kept turning off because edges make a circuit when they touch each other. I wrapped them with friction cables (white tapes on the picture), but they fell down or stick together. Finally, I made another terminal.
Circuit diagram
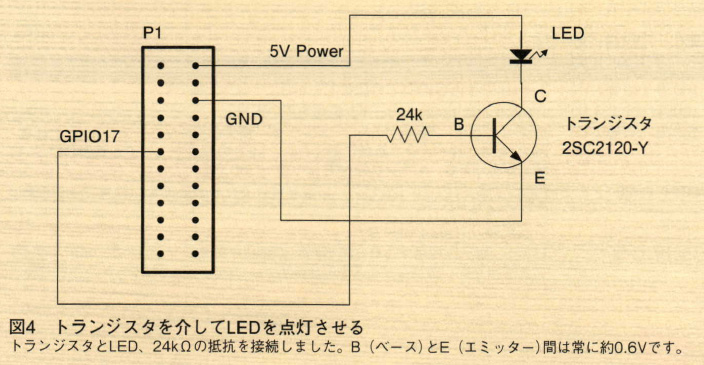
This is the circuit diagram on Nikkei Linux, but I couldn’t understand at all. I showed the magazine to a person at the store, and asked him to pick up what I needed. Because I said “I don’t know that resistance, voltage and current mean”, he helped me. Yes, beginners should go to the stores when they have time!
Actual circuit

It is easy to make the actual circuit because all I needed was to connect components. But I spent time thinking how they fit on board beautifully, simply, and neat.
The white board is called a bread board or a solder-less board in Japan. (I think solder-free is correct.) This is useful to put or pull out electronic components.
I found circuit is similar to computer program. Think an LED as one procedure and call them one by one from up to bottom. When this idea came up to my mind, I felt I got a bridge between my knowledge of computer science and electronics. And I thought breadboards with numbers from up to bottom are better than breadboards with numbers from left to right.
I run the following program (script actually).
#! /bin/bash

if [ ! -x /sys/class/gpio/gpio17 ]; then
echo "17" > /sys/class/gpio/export
fi

echo "out" > /sys/class/gpio/gpio17/direction

while true; do
echo "1"
echo "1" > /sys/class/gpio/gpio17/value
sleep 1
echo "0"
echo "0" > /sys/class/gpio/gpio17/value
sleep 1
done
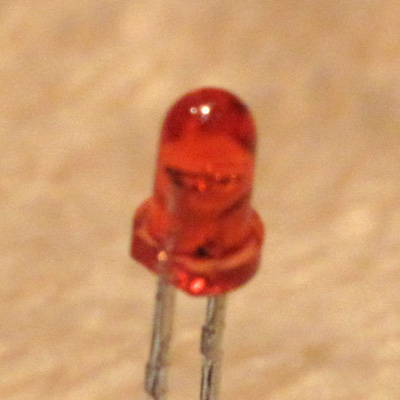
The LED turns OFF …
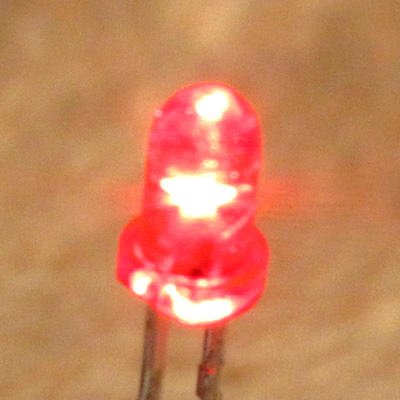
… and ON.
I’m just turning an LED. This is just beginning. 😉
If you are interested in this post, check all posts about Raspberry Pi and Electronics DIY. For example, I posted these articles.
- A total beginner started to learn electronics with Raspberry Pi
A cigarette-box-size computer Raspberry Pi “bridged” between my knowledge of computer science and electronics. More precisely, RasPi made me one of zombies that crowd around circuit boards and connectors. LOL
- Electronics with Raspberry Pi Vol. 2
I couldn’t understand what current, resistance and voltage meant, but having spent money (aka investment 😉 ), I’m getting to understand what they mean.
- Tools I bought besides Raspberry Pi
4 months have passed since I got a RasPi and started to learn electronics. As I study, I needed to buy many things including books, electronic parts and tools. Today I show you what tools I’ve bought besides RasPi.
This post is also available in: Japanese
Leave a Reply