Tools I bought besides Raspberry Pi
4 months have passed since I got a RasPi and started to learn electronics. As I study, I needed to buy many things including books, electronic parts and tools. Today I show you what tools I’ve bought besides RasPi.
SD card
It is very important to choose SD card. Some books recommend buying class-10 SD cards, but it was just a part of truth. Buy an SD card with fast speed. This is what I bought.

I have first bought a Transcend SDHC Class10 4GB, and thought the writing speed was slow. I bought a SanDisk Extreme Pro 8GB and compared.
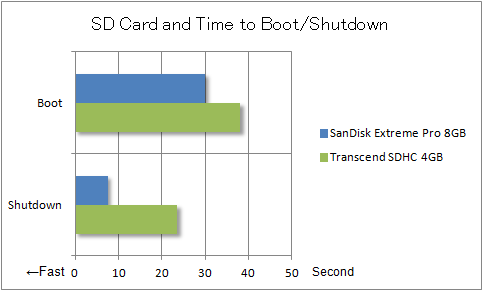
This is the result of my 2013-05-25-wheezy-raspbian environment with some detection of WiFi and Network mount. This means the result is the actual time that I need to wait.
The result was very clear. Especially the shutting down speed was improved! The biggest reason is syslog. It seems writing log when RasPi is shutting down because the messages on the HDMI display says
Stopping enhanced syslogd: rsyslogd.
And this message stays for seconds when I was using the slow SD card. The speed to write the log effects the result.
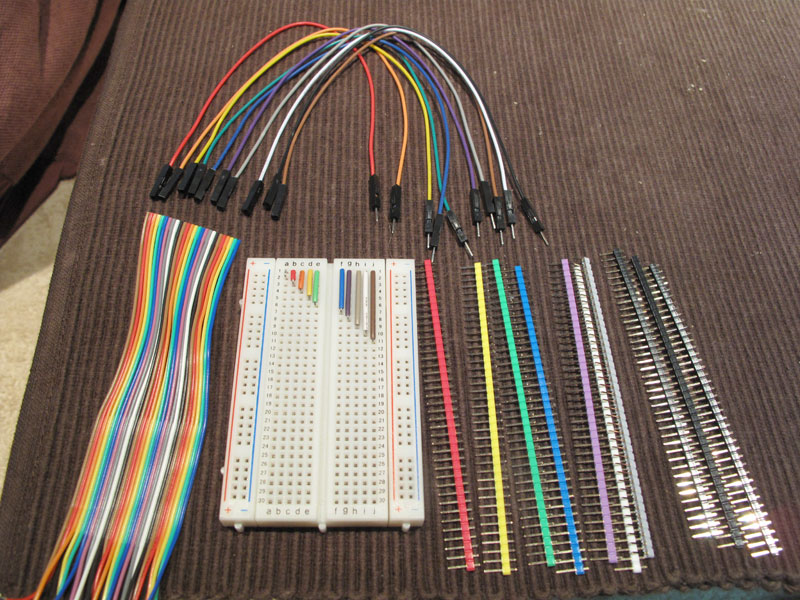
Breadboard
Choosing breadboard is also important. There are some “subspecies”.
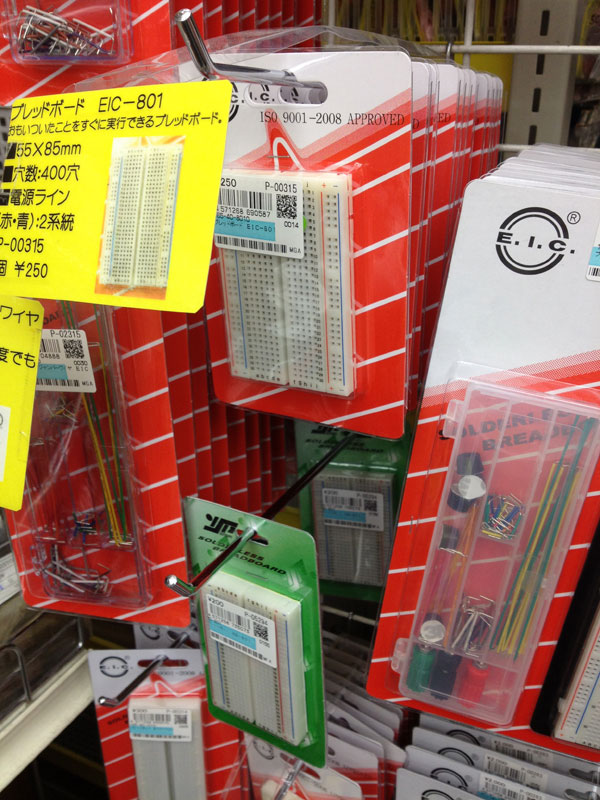
Buy the green one.
The red one can’t hold some parts like this.
The green one (near) holds pin frames (the black parts), but the red one (far) can’t hold it.
By the way, breadboards like these can connect together to expand, but only the one with the same color can connect. The green one and the red one don’t connect.
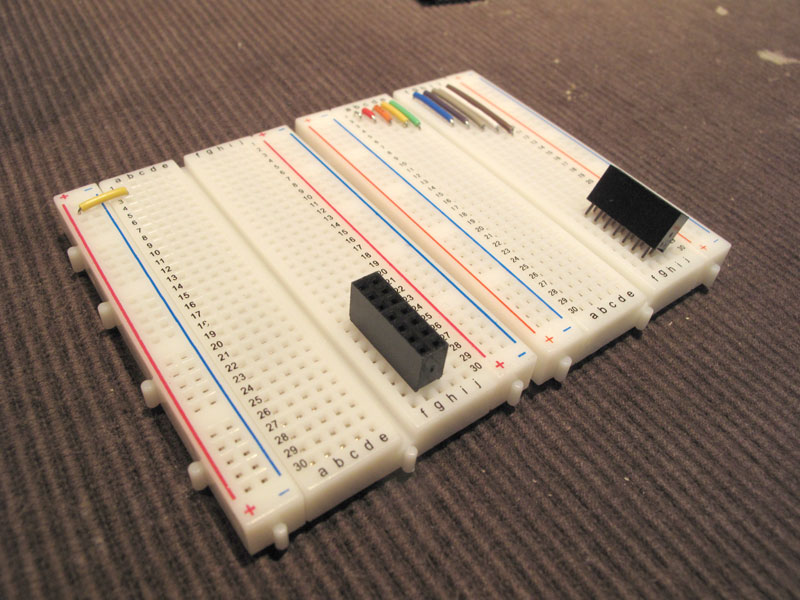
I don’t like the breadboard which is horizontal, from left to right.
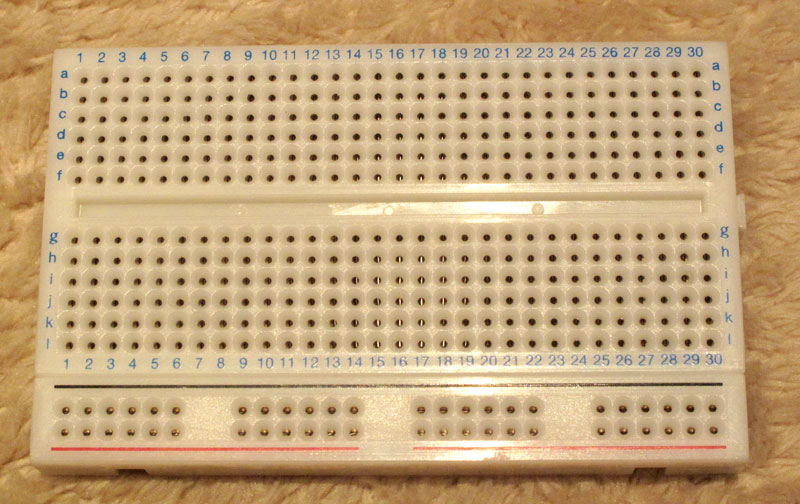
As I told before, circuit is like a computer program. The flow should be from up to bottom.
June 27, 2014 Updated:
This is the complement information about breadboards.
| Color | direction | Manufacture | Item Name | Akizuki Code | Pin Frame Support | Note |
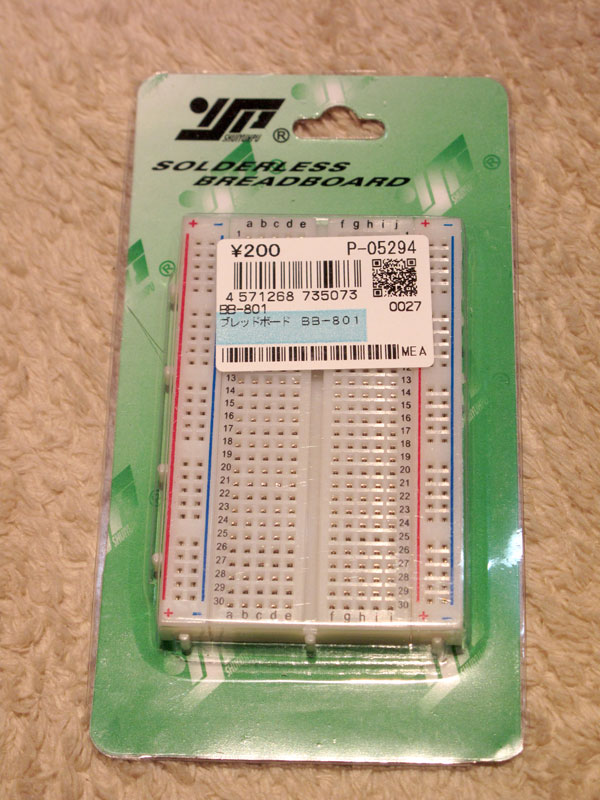
| Green | Vertical | CIXI | BB-801 | P-05294 | Yes | I recommend this. |
| Red | Vertical | E-CALL | EIC-801 | P-00315 | No | I don’t recommend this. |
| Unknown | Horizontal | Sunhayato | SAD-101 | Unknown | Yes | I recommend this if you like horizontal one. |
Wires
There are 3 types of wires:
- One with male connectors
- One with female connectors
- One with male and female connectors
When I just started, I bought all of them, but I found out I use only wires with male connectors.
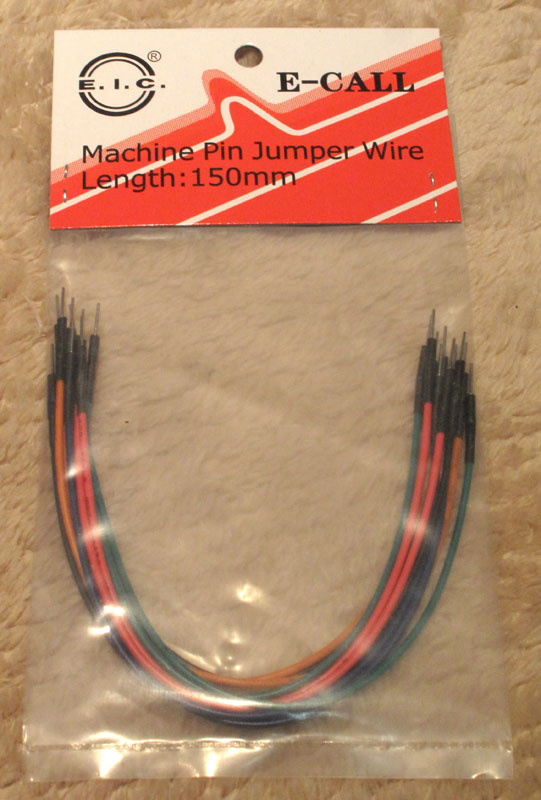
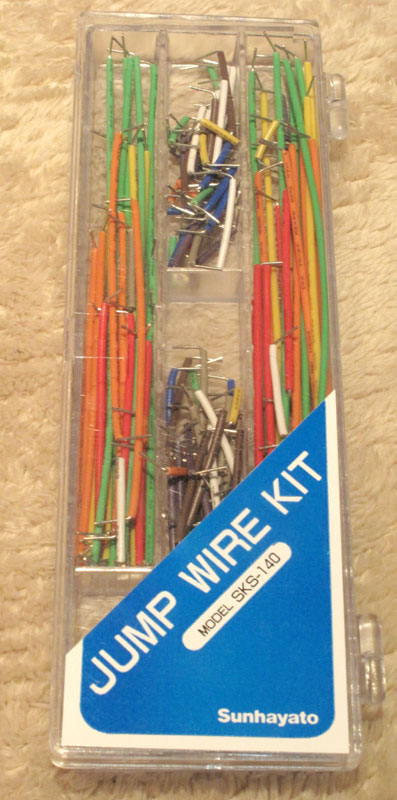
I bought a set of Jumper Wires, but I have used only short wires.
The best way to me is to make wires. The size of the wires in the set are 0.65mm (core) and 1.45mm (outside). I bought the same wire and a wire stripper.
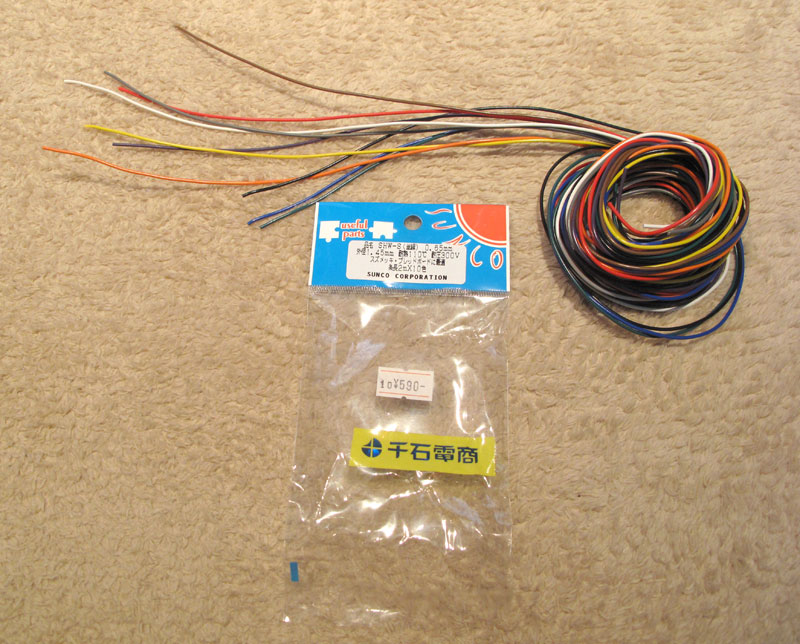

I was using an X-Acto knife first, but it was not a good way. It takes time, and wires snap easily and remain on the breadboard.
By the way, breadboards and wires are based on inch system, not metric.

This scale has 2 units. The above side is inch, and the bottom side is millimeter. The smallest unit of this inch scale is 1/32 inch. I was surprised to know that there is no way to describe. My friend in the US said,
The US system is just stupid! We say stupid things like 3/8th’s of an inch, or 1/4 of an inch. An inch has 32 32nd’s of an inch!
Look at the pins. They are not on the lines on the scale. This means there is no way to know the width of these pins even they are based on inch. This is ridiculous! A sign in the electronic components store in Akihabara says the width is 1/10 of an inch.
Wikipedia says there were many definitions in the history. And 1 inch is finally defined exactly to be 25.4mm. This is a luck out of nightmares. Can you imagine if 1 inch couldn’t express like Pi? I mean Pi is 3.1415…, and what if 1 inch were like 25.415…?
By the way, the Japanese law prohibits to sell inch scales. Ministry of Economy, Trade and Industry, says “Selling or displaying for sell scales with unlawful units is prohibited.” I bought this scale in the US. Yes, I haven’t seen scales in inch sold in Japan, but I have never thought it is prohibited.
Wires are colored in rainbow, but this is more than that. They associate colors with numbers.
| Color | Number |
| Black | 0 |
| Brown | 1 |
| Red | 2 |
| Orange | 3 |
| Yellow | 4 |
| Green | 5 |
| Blue | 6 |
| Purple | 7 |
| Gray | 8 |
| White | 9 |
Look at the wires on the breadboard. The red wire is connected to the row 2 lines down.
These colors are also used on resistance. Brown(1), black(0) and red(2) are 1000 ohm. Brown and black makes 10, and red makes 10 squared (10 to the 2nd). Search for more detailed information.
It is useful to memorize the combination of colors and numbers. I was taught to do so in the junior high school. We used a kind of word play. “One cup of tea”, and “Red carrot”. (Chinese character of tea means brown too, and the pronunciation of carrot in Japanese “Ninjin” and 2 (like “knee”) are same.) I haven’t used these numbers for more than 20 years until I use RasPi, but I remembered most of these numbers! How could I remember?
Some colors are chosen depending on what they do.
Red Voltage+
Black Ground (GND)
White Data-
Other Colors except for white Data+
For example, USB cables are using a red wire (5V), white wire (Data-), green wire (Data+) and Black wire (GND).
Lead Bender
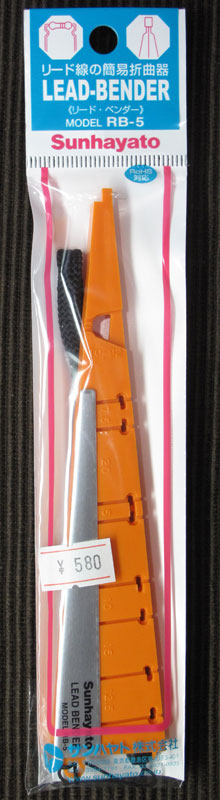
This is a tool to bend. I bought a Sunhayato RB-5. You can bend like this.

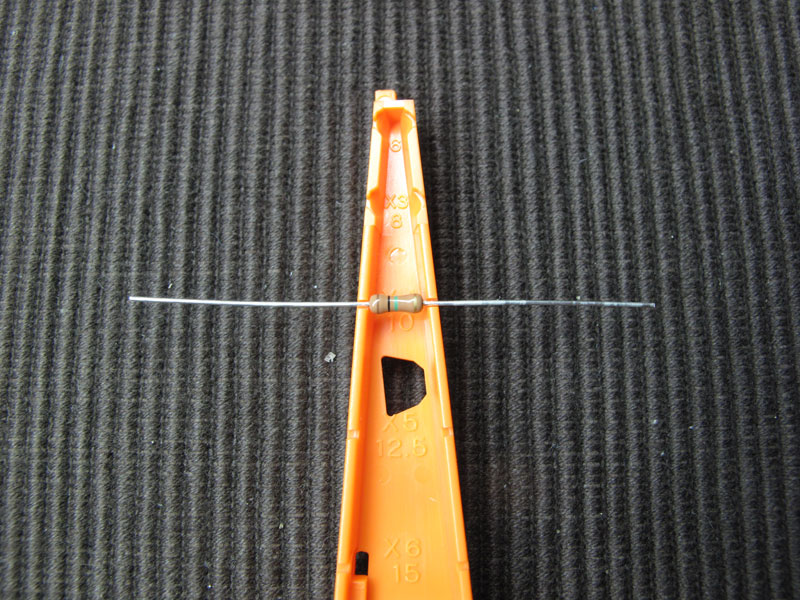
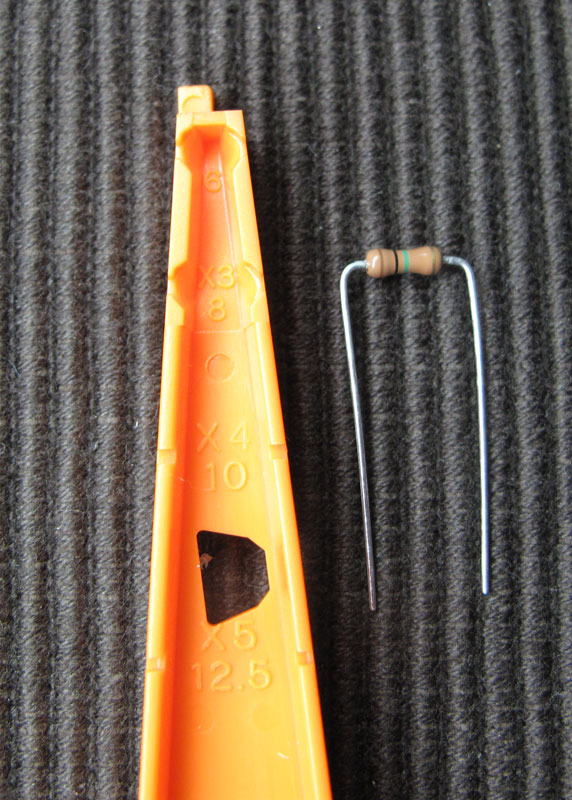
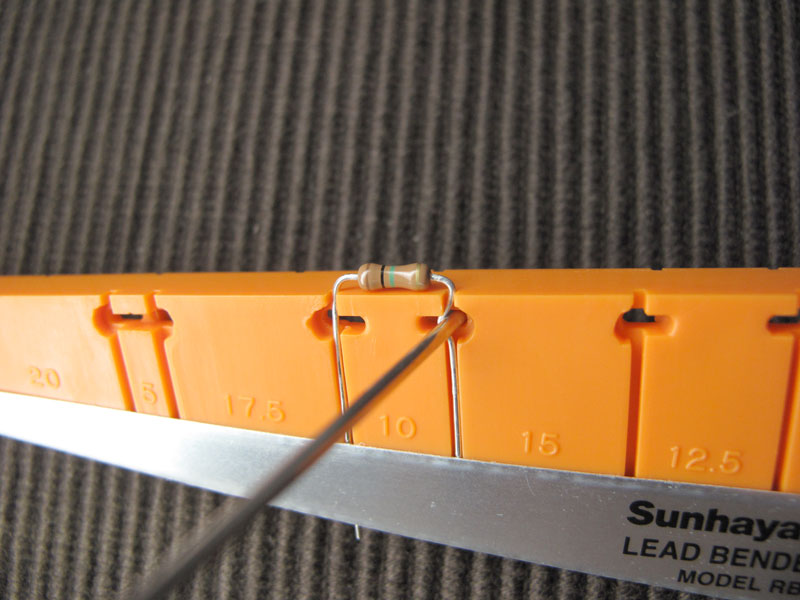
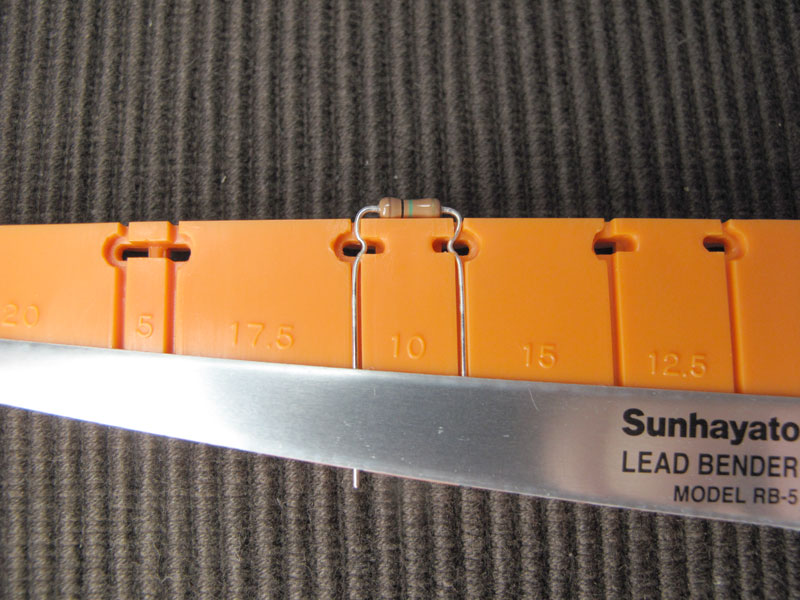
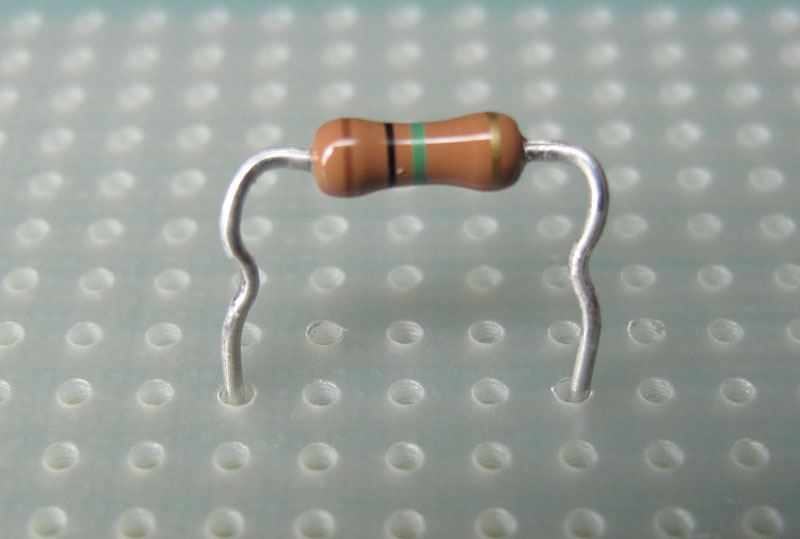
Before I had this, I was bending with a plier. This is easy, saves time, and bends beautifully!
Soldering Iron
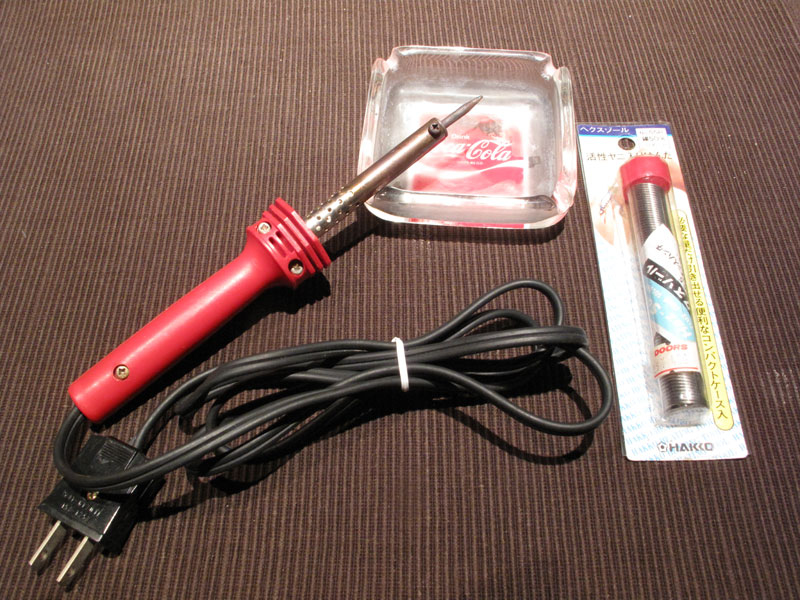
This is my soldering iron. I made this in the same classroom when I was memorizing colors and numbers. Because I couldn’t believe I could make an appliance, I couldn’t throw this away and it was shelved. I have never thought I use this again 20 years later!
Multimeter
This is a device to measure voltage and resistance.
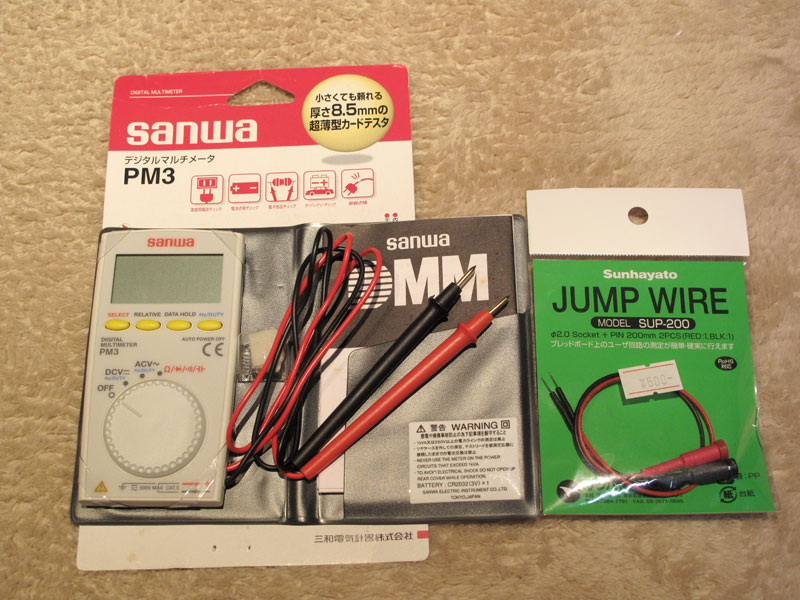
The one I was using first is a Samwa PM3. I bought this before because I wanted to know the remaining energy of my batteries, but I couldn’t understand how to do that. Since then, this device was shelved. By the way, there is no way to tell how much energy the batteries have. The checkers sold in the stores show it depending on how much voltage the batteries have, not from the actual energy. To measure the actual energy, I think I need to measure the actual current.
These days, after I use RasPi, I started to learn how to use a multimeter. A Jump wire,SUP-200, Sunhayato, is useful when I measure circuit on my breadboard.
As I use RasPi, I needed to measure current. I asked at the electronic store, Sengoku in Akihabara, and he said I could measure current with PM3. I asked at Marutsu, and he said PM3 couldn’t.
In conclusion, PM3 can’t measure current. The Instruction doesn’t say I can or I can’t. This means PM3 can’t. Anyway, I’m surprised a person who doesn’t know how to use a multimeter in an electronic store in Akihabara, but he might be hired to put merchandises from boxes. I felt I need to judge by myself in the end.
After that, I bought this one.
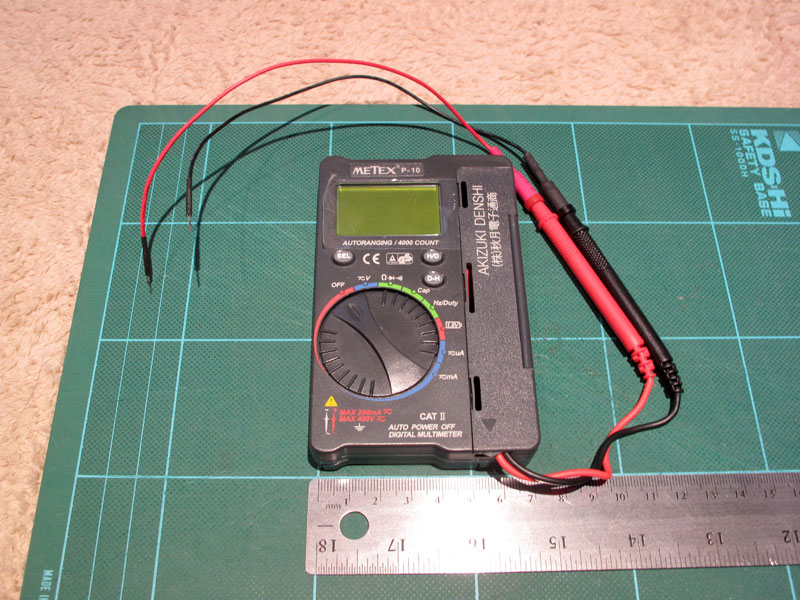
This is an Akizuki P-10 and costs only 1,000 yen. (USD10) This one can measure current.
But my curiosity went soon more than what P-10 can measure. When I measured a CPU fan, P-10 says “0L”. I guess this means overload or out of load. The instruction even doesn’t say what this means!
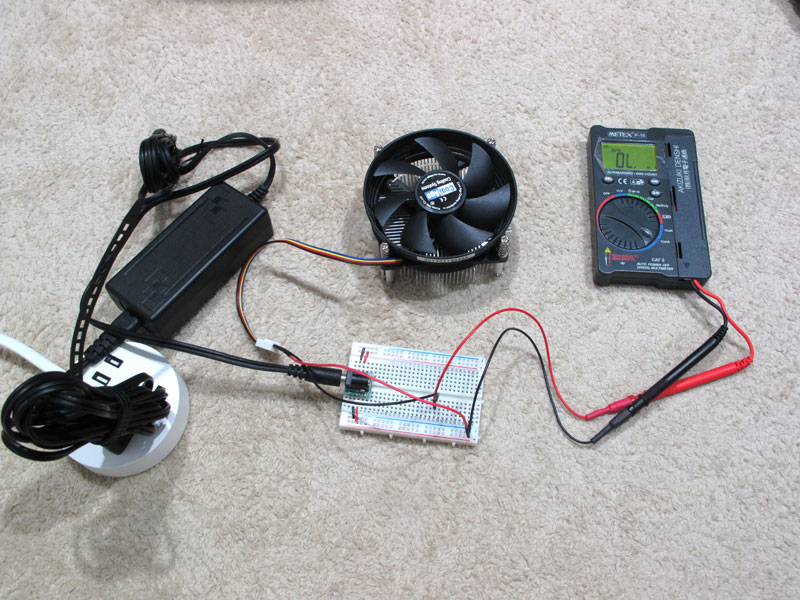
I thought I was wrong, but I decided to buy a good one because there are other things I couldn’t measure.
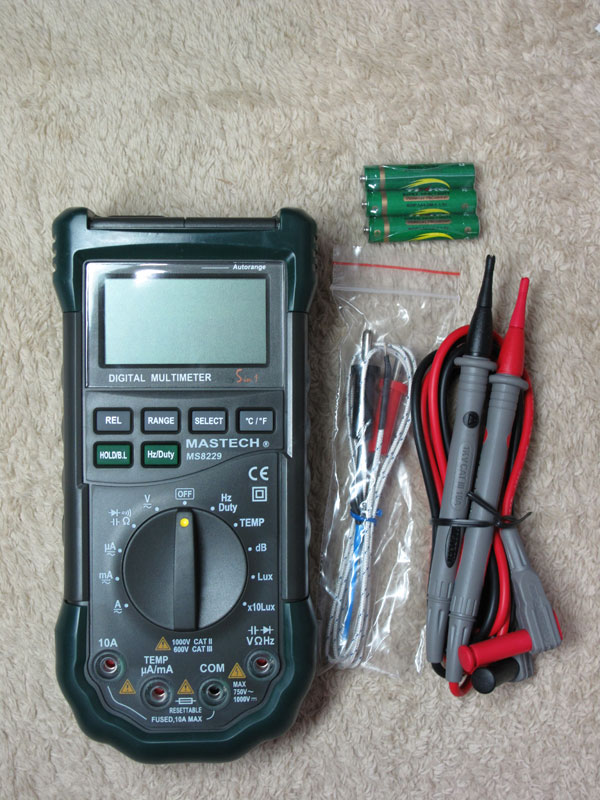
This is a Mastech MS8229 and costs 5,200 (USD52) yen, the most expensive one at Akizuki. This one can also measure temperature, humidity, sound level and luminance. I measaured the CPU fan again, and MS8229 works!
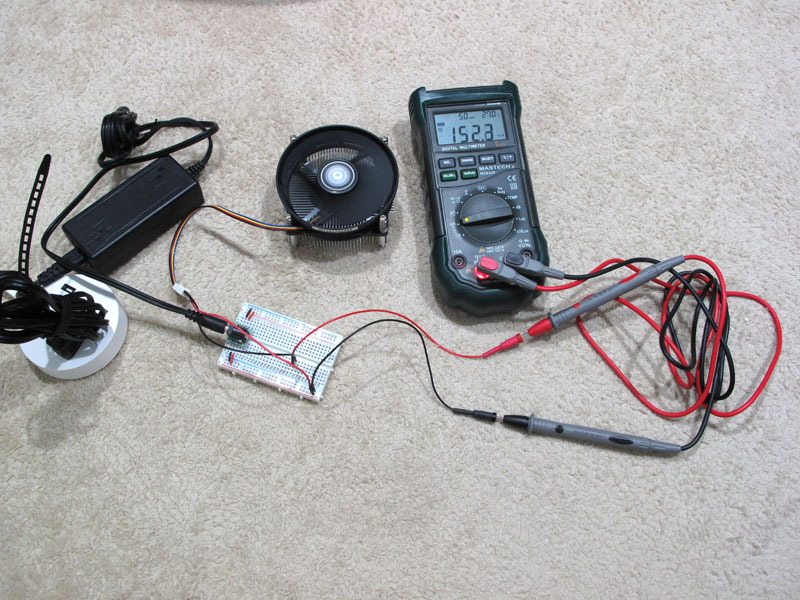
MS8229 says the current is 152.3mA, which IS within the range of P-10 (200mA). I don’t know why my P-10 couldn’t measure this.
If you are interested in this post, check all posts about Raspberry Pi and Electronics DIY. For example, I posted these articles.
- A total beginner started to learn electronics with Raspberry Pi
A cigarette-box-size computer Raspberry Pi “bridged” between my knowledge of computer science and electronics. More precisely, RasPi made me one of zombies that crowd around circuit boards and connectors. LOL
- Electronics with Raspberry Pi Vol. 2
I couldn’t understand what current, resistance and voltage meant, but having spent money (aka investment 😉 ), I’m getting to understand what they mean.
- Tools I bought besides Raspberry Pi
4 months have passed since I got a RasPi and started to learn electronics. As I study, I needed to buy many things including books, electronic parts and tools. Today I show you what tools I’ve bought besides RasPi.
This post is also available in: Japanese
Leave a Reply