Making and studying an Akizuki Triac Dimmer (speed controller) and case processing
I made a “multi-purpose dimmer with a triac” sold at Akizuki Denshi. There were many troubles because I am a beginner. I needed not only to solder but also making new holes on the circuit board and process a Takachi case.
I wanted to use electricity. Our life depends on gas, water and electricity. There is limited use of gas, because we can only burn it, but water can be used in many ways like drinking, cooking and bath. How about electricity? I can plug an appliance to a wall socket, but I don’t feel I’m using electricity like water. If you can use electricity like water, don’t you think it is useful?
There are many “kits” sold in stores in Akihabara, but most of them work with batteries. I was looking for a kit that worked with a wall socket, and finally found this “multi-purpose dimmer with a triac”. This is a device that can reduce power from a wall socket. I had never thought of its usage when I bought it, but this became an important tool for my DIY projects.
How it works
Electricity you get from a wall socket is alternate. Alternate is a power source that voltage changes as time elapses. In Tokyo, alternate of 100V 50Hz is used. See the figure below.

Alternating Current 50Hz
August 27, 2014: This graph is made for explanation purpose only. The actual value may be different.
50Hz means 50 times repetitions in one second. This means one cycle is 1/50 = 0.02 second. Positive number means left plug has voltage, and negative number means right plug has voltage.
The shape will be the same in other countries. For example, Zürich uses 230 volts but one cycle ends in 0.02 second.
Japan is a unique country as I keep saying 😉 We use both 50Hz and 60 Hz. The border is Fuji River.
http://en.wikipedia.org/wiki/Fuji_River
60Hz AC changes like this.

Alternating Current 60Hz
60Hz means 60 times repetitions in one second. This means one cycle is 1/60 = 0.0125 second. So another cycle has already started at 0.02 second.
Even we have many combinations of voltages and frequencies, you don’t have any trouble when you travel because AC adapters take care of it.
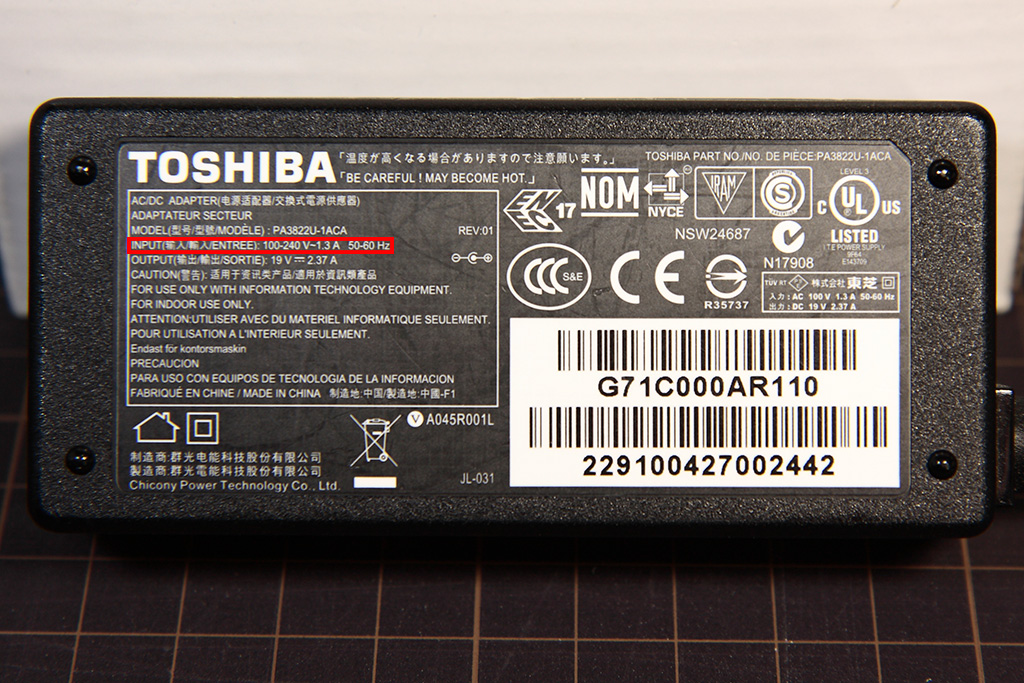
AC adapter
Most AC adapters have a sign saying “INPUT 100-240V 50-60Hz”. This means the adapter can handle any combinations of voltages within 100-240V and frequencies within 50-60Hz. There are rumor that you need a transformer. You don’t need a transformer unless your AC adapters have this sign. You can connect your AC adapters directly to a wall socket. (But you may need to convert the plug.)
“multi-purpose dimmer with a triac” (dimmer) changes voltage like this.
Alternating Current 50%
The half of a mountain is gone. This is like you plug and unplug every 0.005 second.
Tips to make
I had some trouble making this kit because of these reasons.
- There is no explanation about which components to be soldered where.
In general, kits come with a list of components with numbers, and the same numbers are printed on the circuit board. This kit doesn’t have a list or soldering example. You need to find it from the circuit diagram. - Not all the necessary holes are opened.
You need to open holes for power plugs and a fuse. - Unnecessary holes are opened.
There are holes you don’t need. I still don’t know why…
This is the complete soldering example.
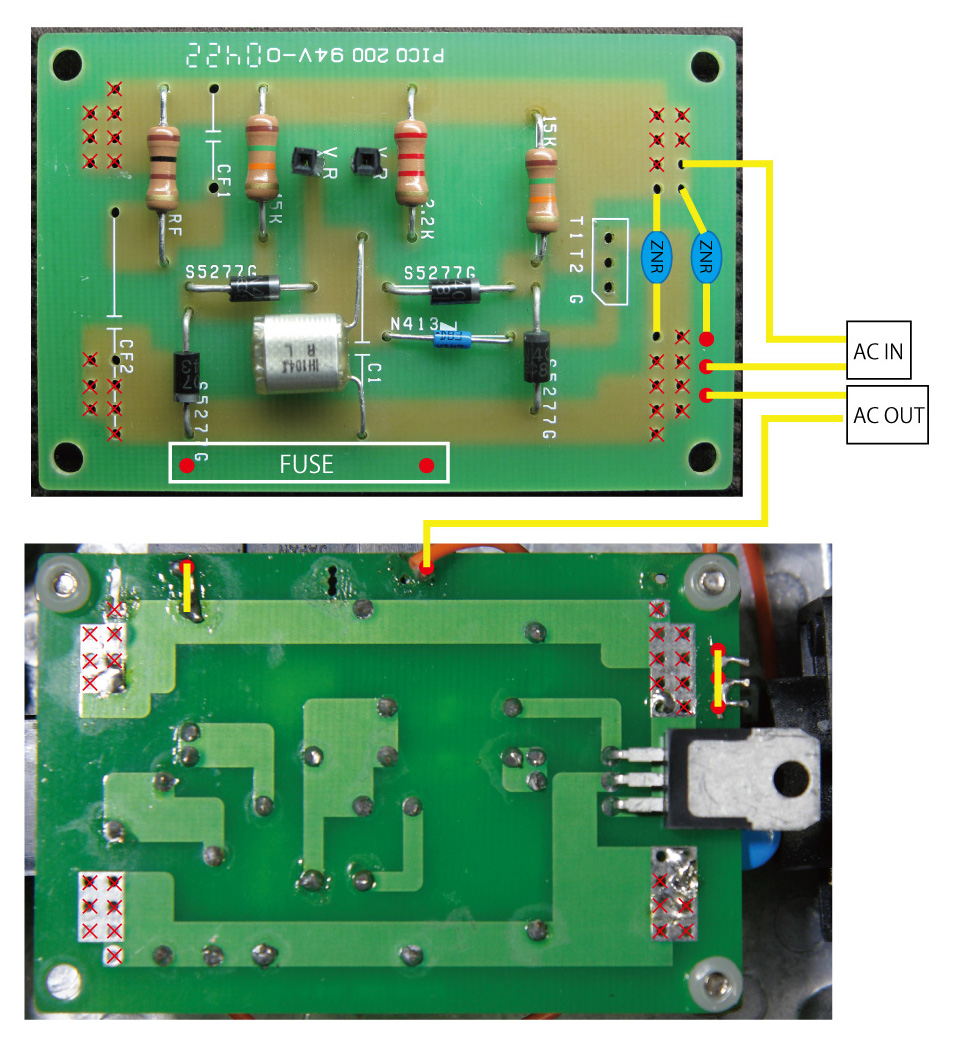
Modified Circuit
You need to open holes at red points. You need to wire yellow lines. I haven’t used holes with red x mark. I used these film capacitors.
- CF1 0.1μF 250V
- CF2 1μF 250V
Choose a fuse depending on what appliance you want to control. A fuse is a wire that burns itself so that the circuit is cut off when there is current more than it can handle. I wanted to control some appliances, and the appliance which uses the highest watt (W) was a vacuum cleaner. The spec of the vacuum cleaner was below.
AC100V 50/60Hz 1000W
I used the formula below to get the current.
W = V * A
1000 = 100 * A
A = 10
This means 10A runs in the vacuum cleaner. The label on the cleaner also says the cleaner has a 15A fuse inside. I guess the engineers assume the current is 10A and a threshold for safety 15A. I decided to use a 15A fuse.
Soldering Tips
Then I went back to the circuit board and thought about how to fix it to the case. You need spacers and screws.
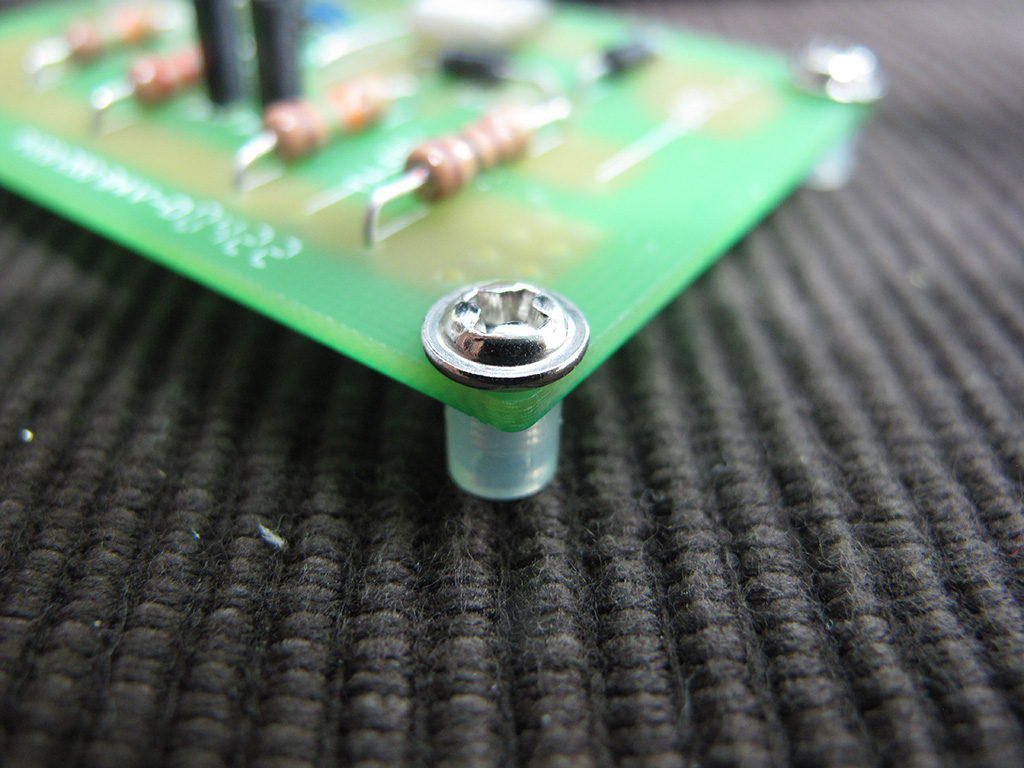
Spacer and screw
A spacer costs 20 yens each. It is just a plastic piece, but costs a lot! I looked for alternative materials and found this.

Perler Beads
This is a toy to make accessories called Perler Beads. The height is 4.8mm and the diameter is 4.9mm (hole is 2.7mm). You can manage to use ISO M3 screws, but beads can’t hold strongly because they don’t have screw threads. You can “tighten” beads by heating. If you can use this material, it must be useful.
You need to figure out how to solder the triac. Adjust it so that the triac touches the case tightly.
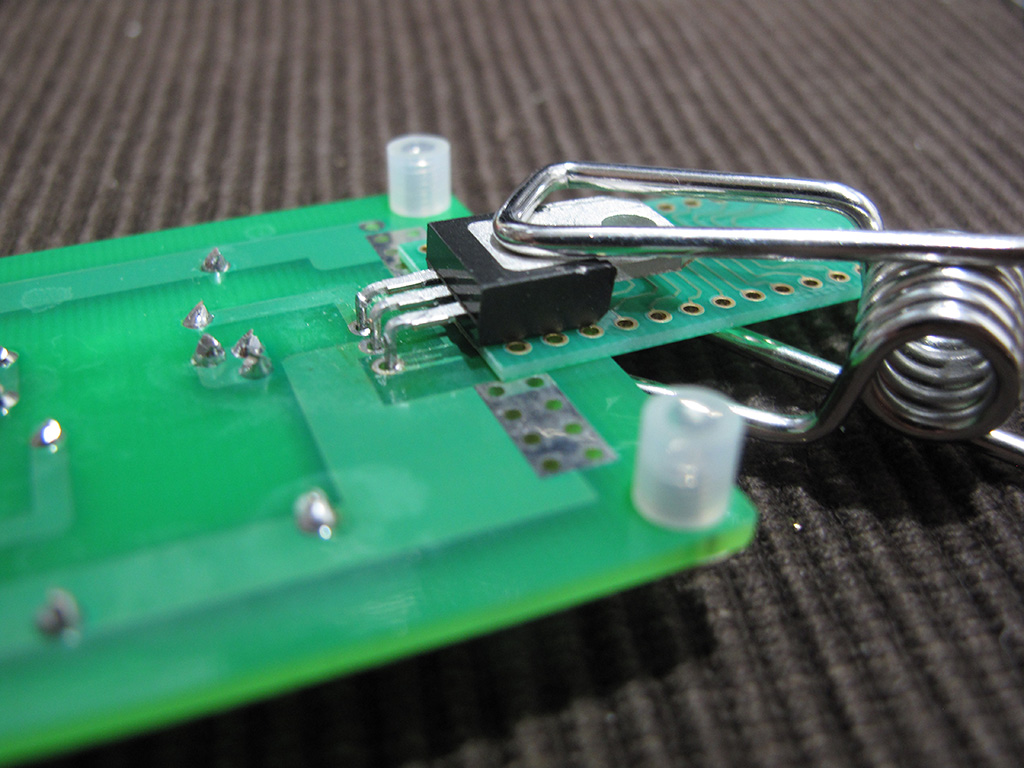
Soldering triac
This is how the spacers and the triac should be.
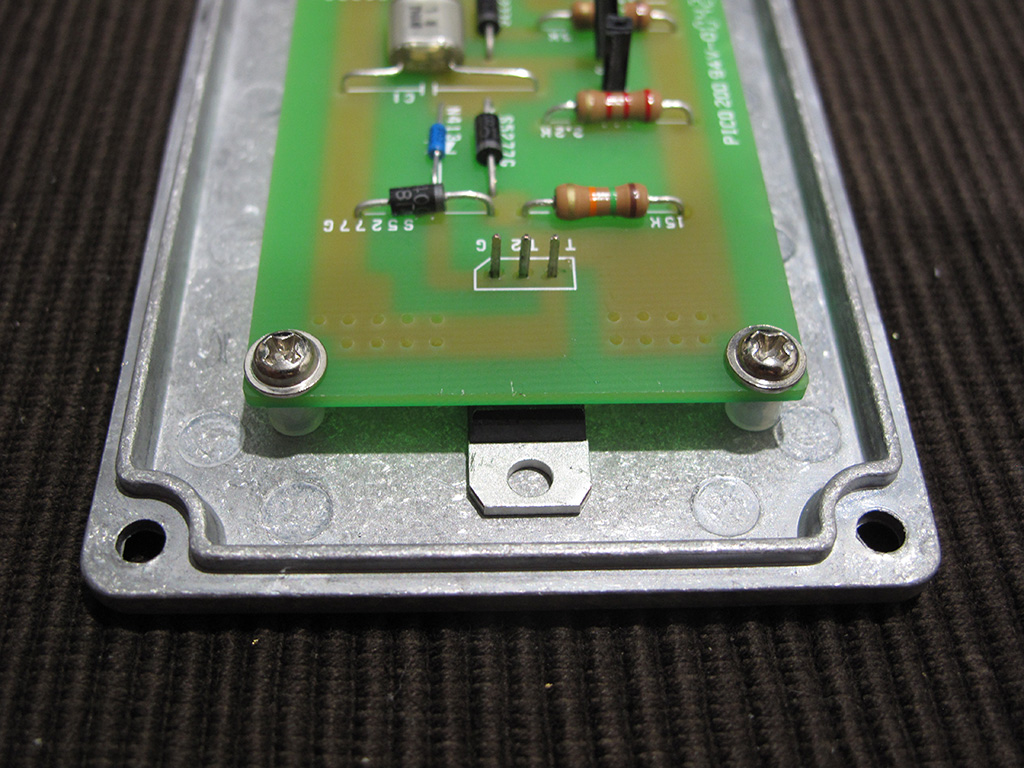
After soldering triac
The spacers and the triac were set to almost the same level. As current goes up, the triac generates heat. If you can adjust, the case can help the triac to cool down.
Then I tested.
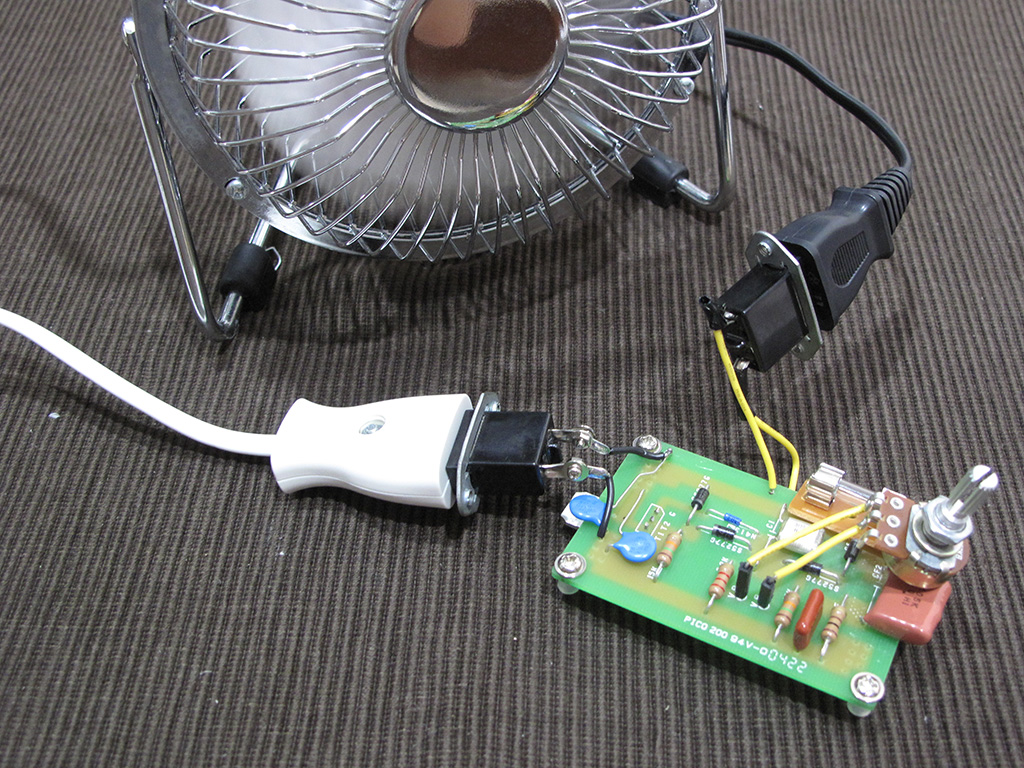
Testing
I connected a fan and I could slow down. 😉
Case Processing
I chose a Takachi alminium die cast box TD7-10-3.
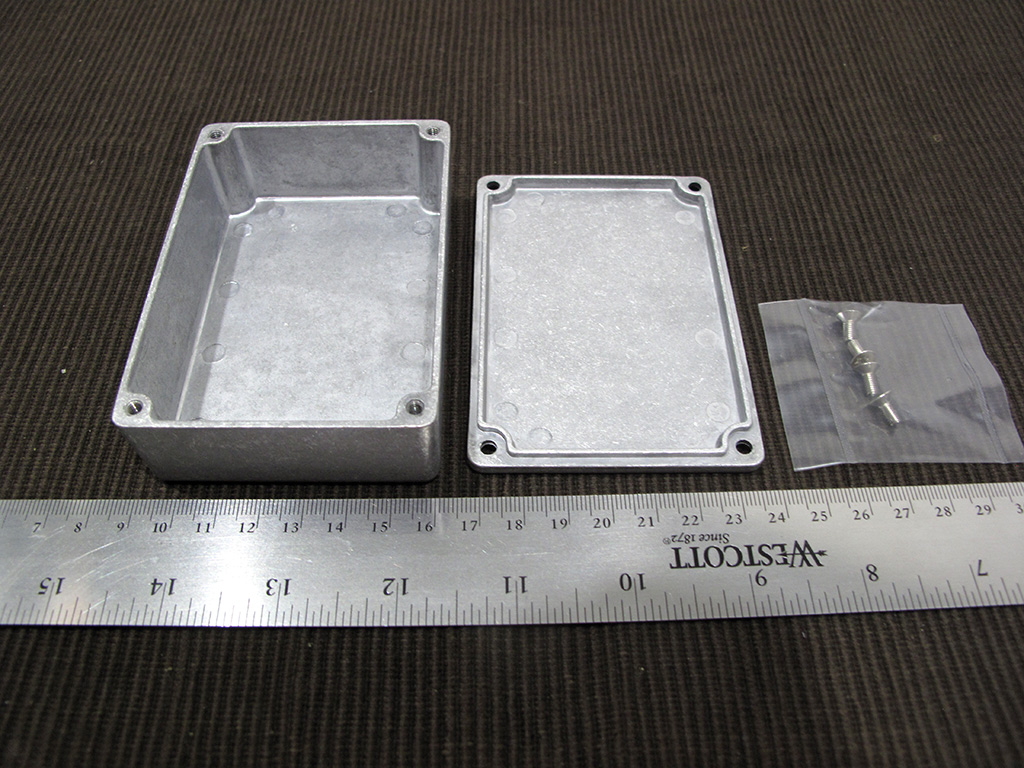
Takachi TD7-10-3
First of all, I added a Hairline Finish. It is just to file in one direction. I tried on an aluminum board that I bought at Tokyu Hands with several files.
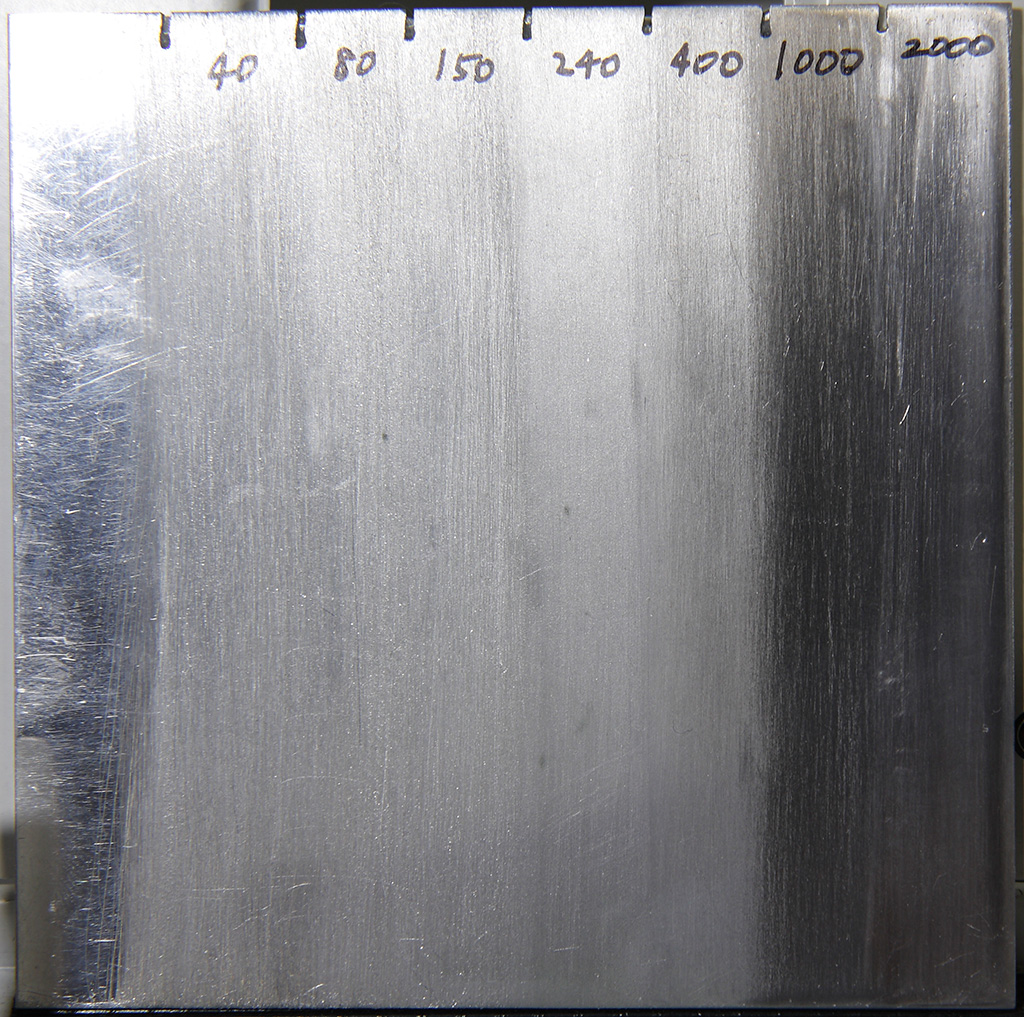
Hairline example
As I change numbers, not only texture but color changes. It is interesting. I chose #150.
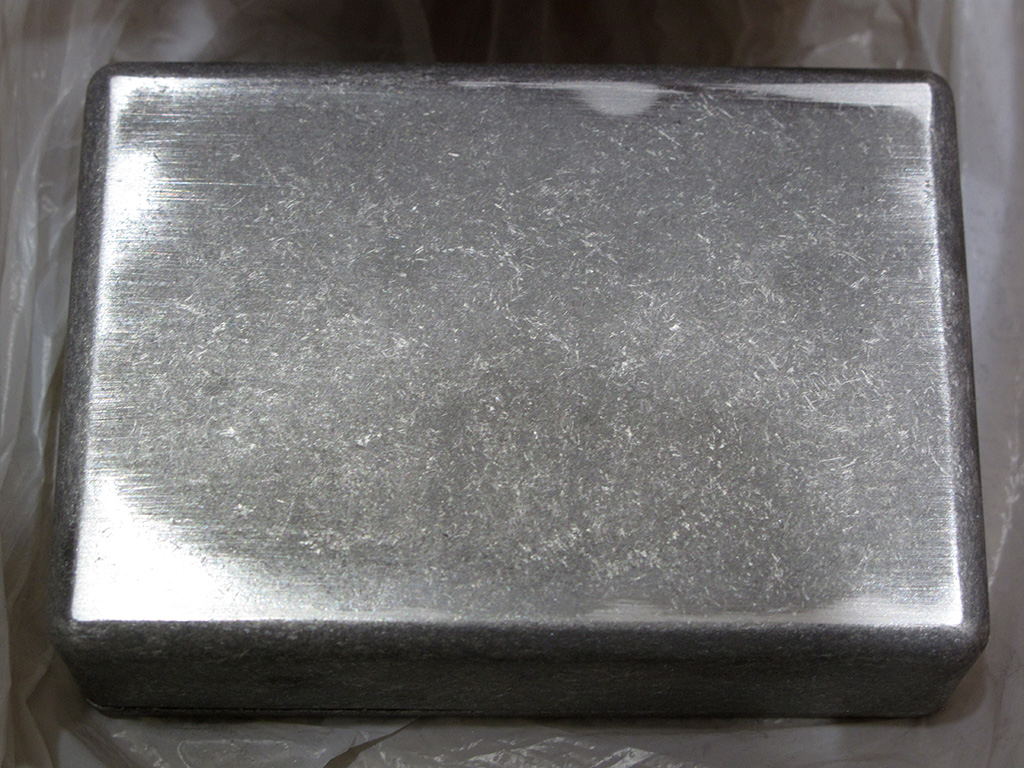
Case sanding 1
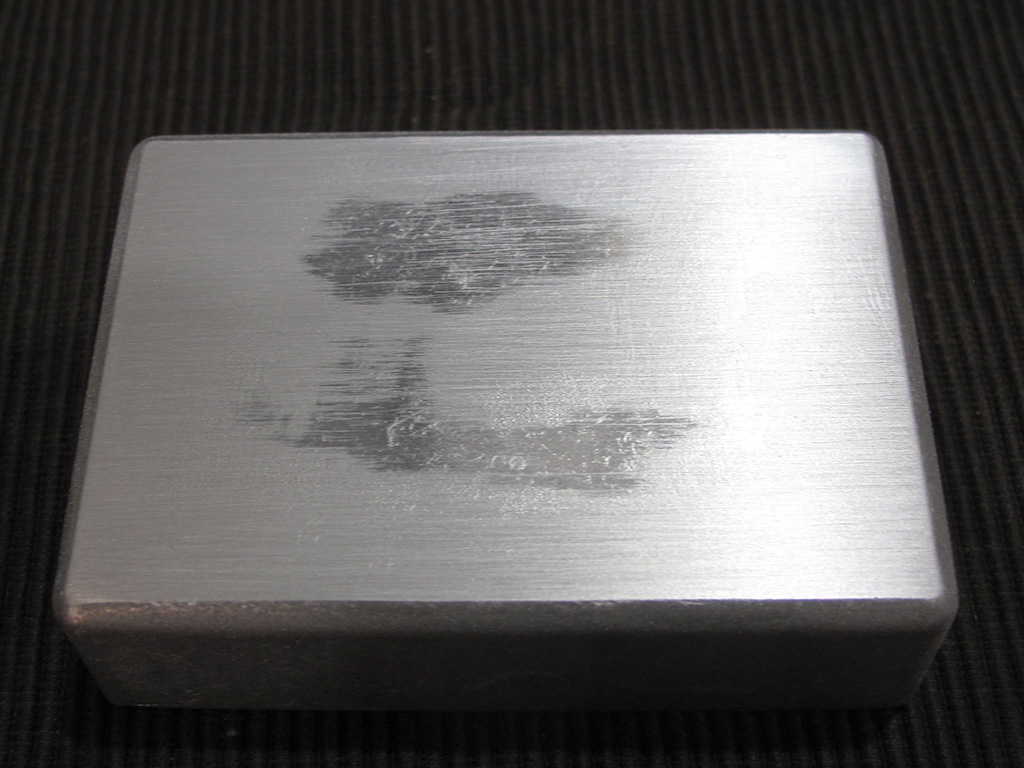
Case sanding 2

Case sanding 3
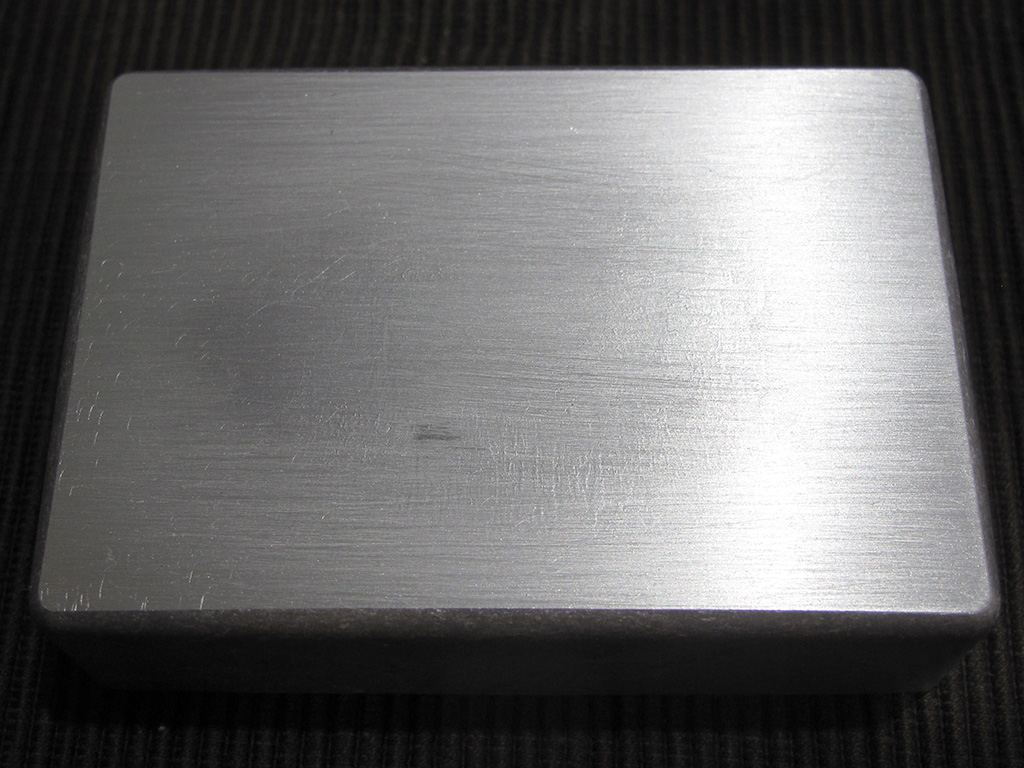
Case sanding 4
Making jigs
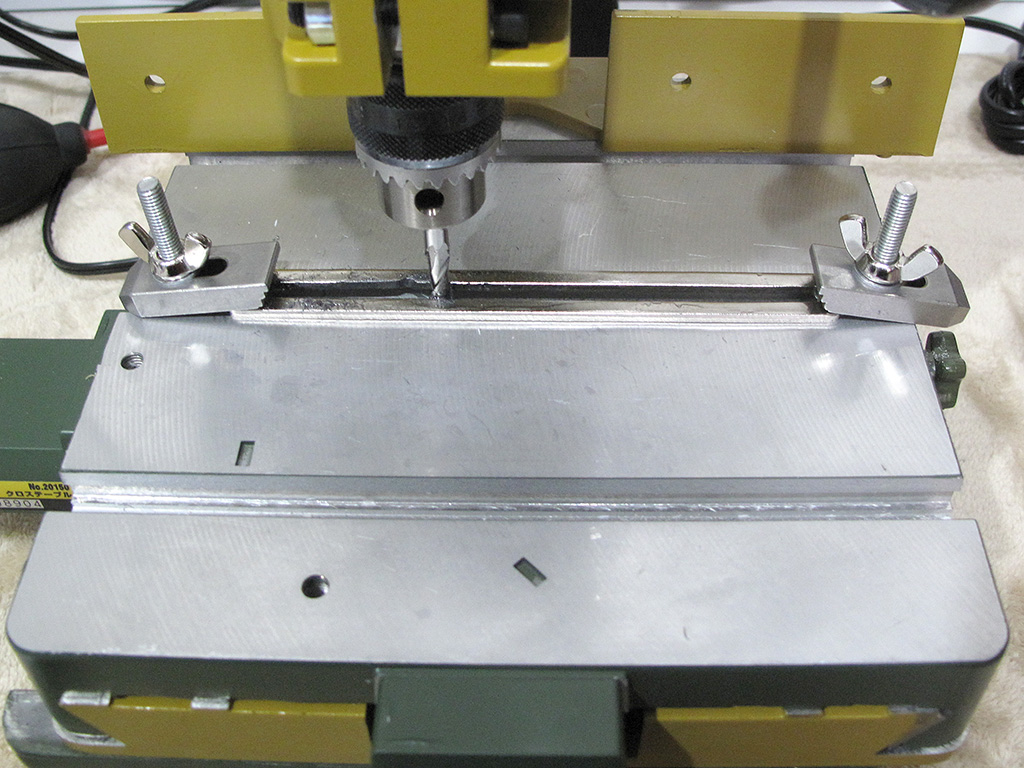
Before I drill my case, I needed to fix the case on my milling machine. I needed to fix it at least 10cm above the stand.
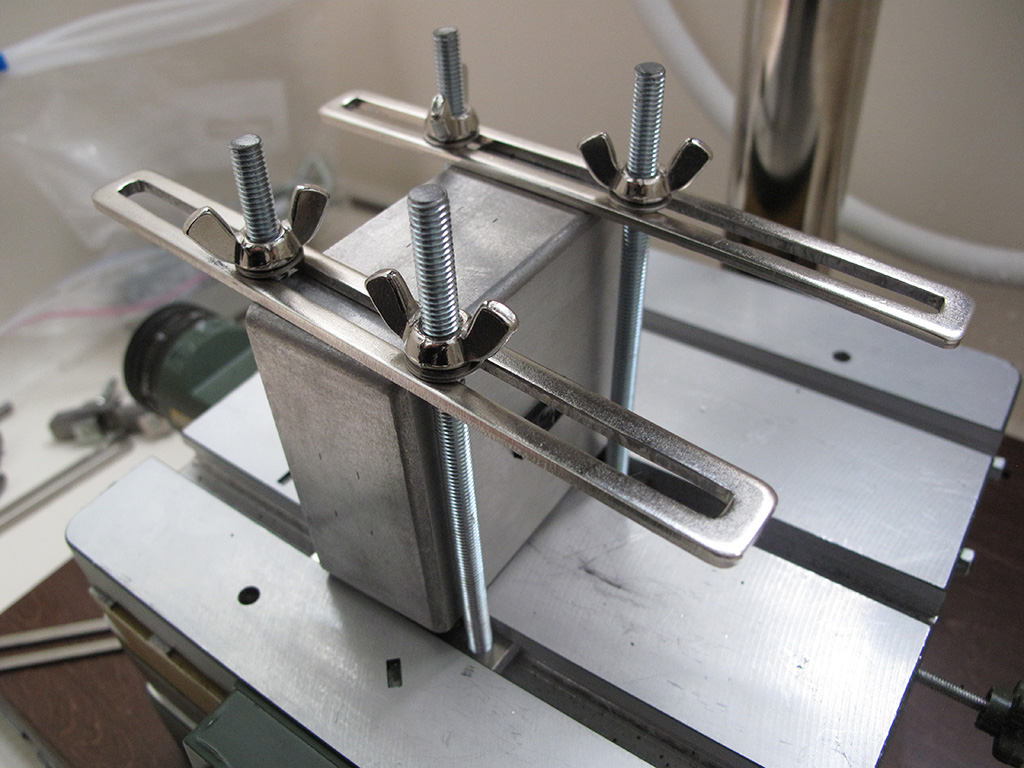
Fixing object on milling machine
But these jigs don’t come with the machine. I researched a lot, and found DIY users often make jigs by themselves! I decided to make them too. I prepare some stuff.
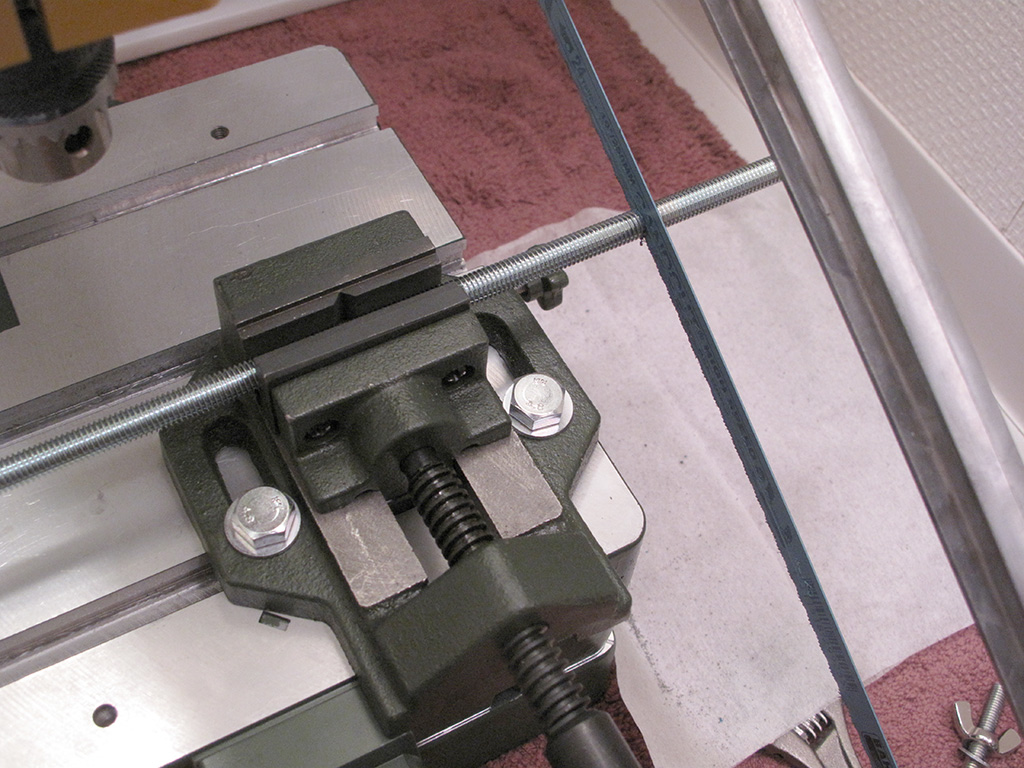
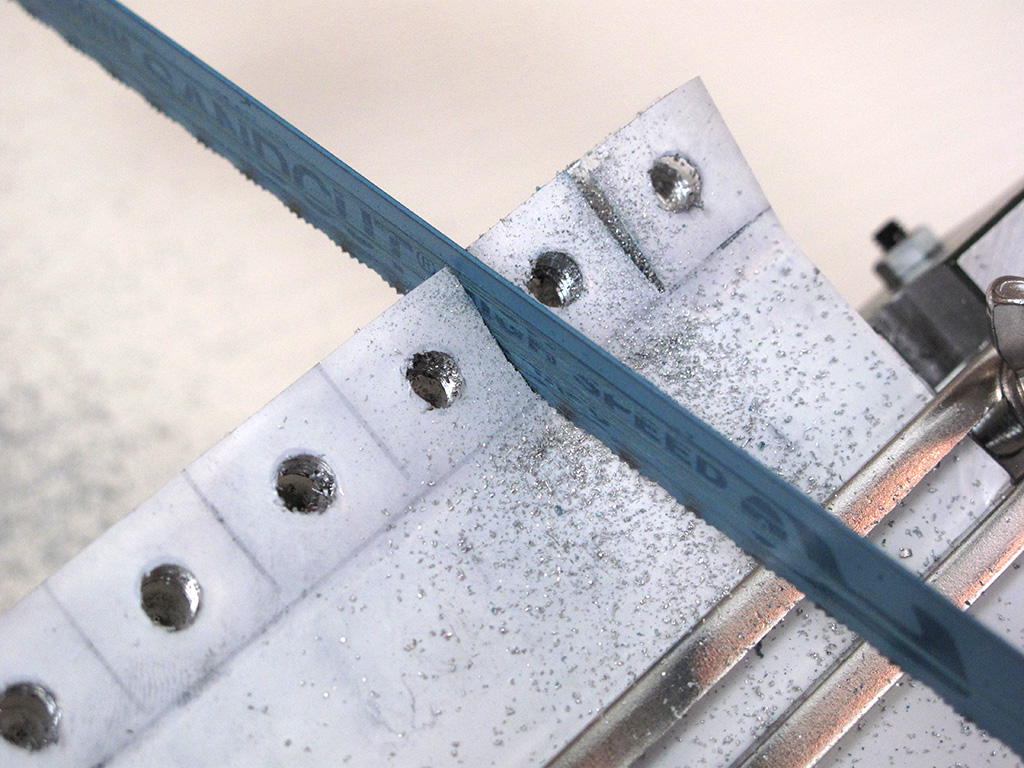
Cutting threaded bar
I bought a machine vise (Proxxon No.20300), hand saw (Bahco 227) and a screw thread bar. I think you can attach a vise other than Proxxon. There are many hand saws, but Bahco 227 is useful because it can hold a blade not only vertically but horizontally.

Burr
After I cut a screw thread bar, I filed to get rid of burr (projecting on the surface). This bar is made from iron, but plated with zinc. It is hard to tell from seeing, but the surface rusts in 1 or 2 weeks. I painted to protect the surface.
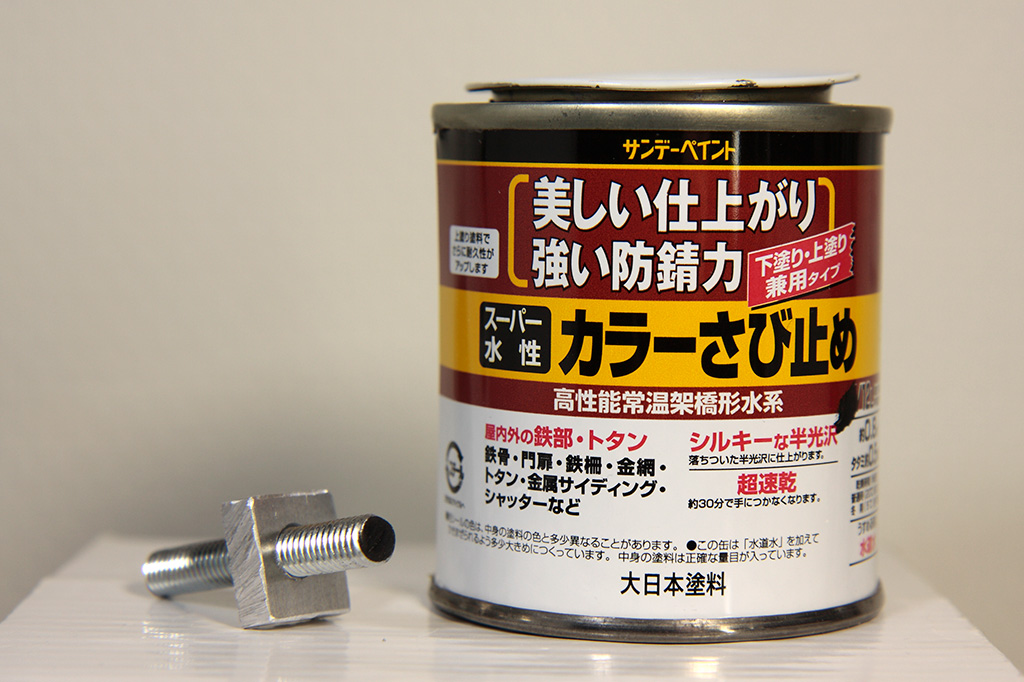
Anti Rust Painting
The paint is a Dainippon Color Antirust.
I used a Yawataneji HK-15 as holding the case.
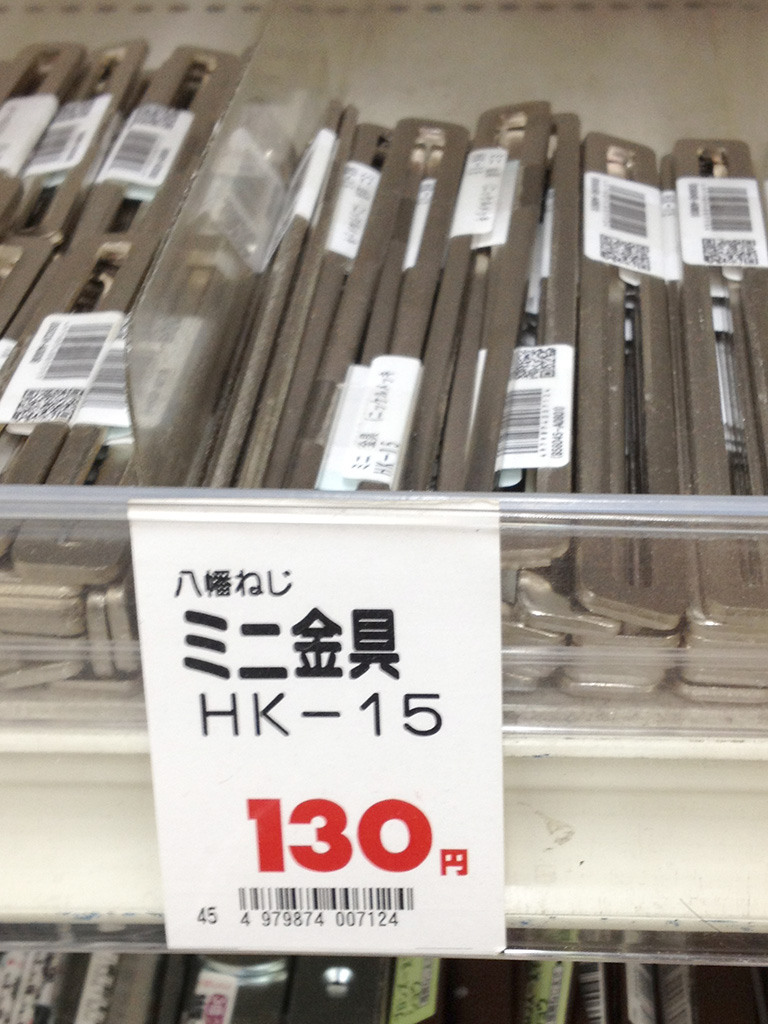
Metal bars
HK-15 is bit narrow inside, so I needed to widen it.
Cutting metal bars
I made square nuts at last. I bought them at a store, but they were too small and unstable.
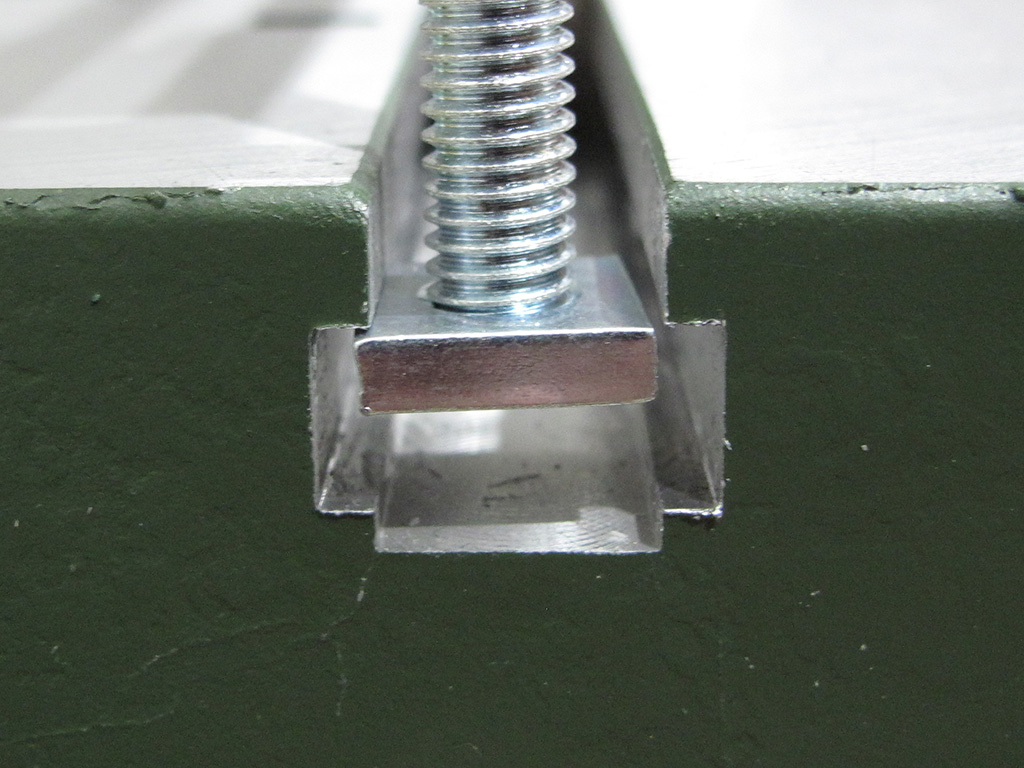
Nut not enough big
I opened holes on an aluminum board bought at Tokyo Hands. These are pilot holes.

Opening holes on aluminium board
I used a tap to open screw holes. I thought only robots in factories can open screw holes. I had never thought I could do it by myself!
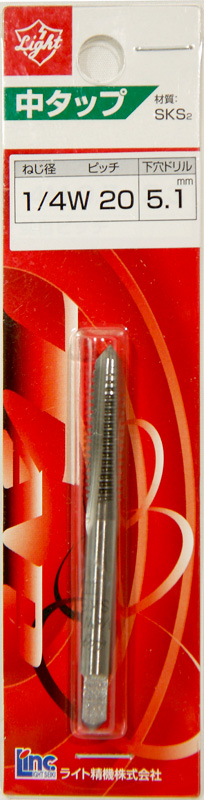
Tap
I bought a Light Seiki tap. This tap is a 1/4W, but I used ISO M6 this time.
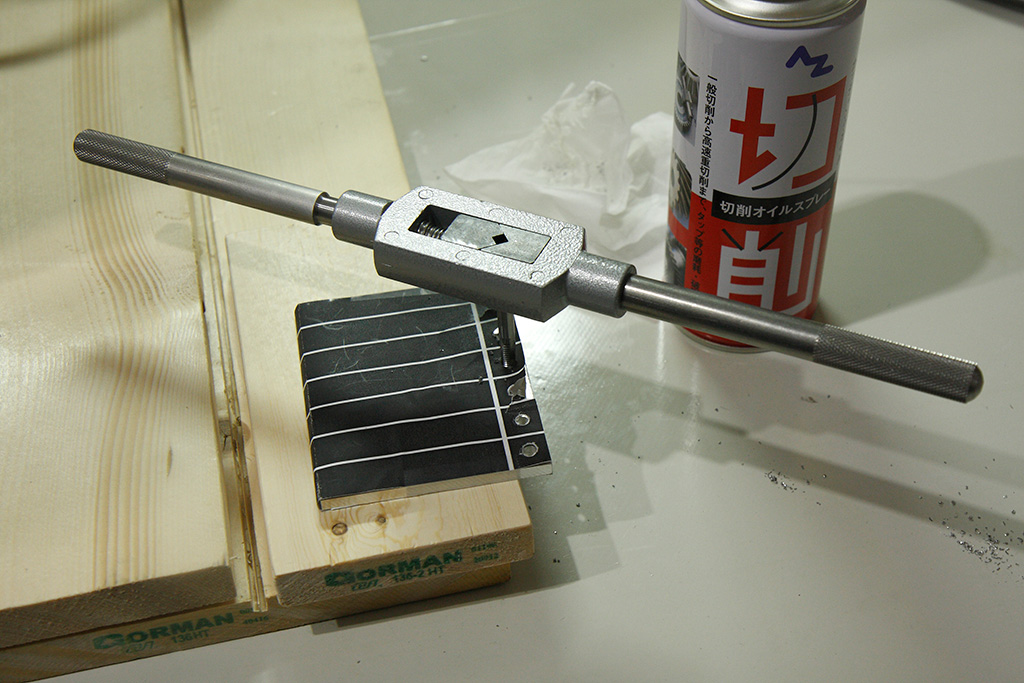
I placed a tap into a holder and rotate it by hand. Because the holder was hard to hold, some holes were bit slanted.

Tap and tap holder
I bought a bigger holder. This is much better.
Large tap holder
When you open holes, you need to use oil. (like one in the picture) It helps so that you don’t need to add power, and protect taps. I used oil in previous all metal processing.
Cut them in piece with a hand saw after making holes.
Cutting aluminium board with hand saw
I filed them and put them to the screw bar.
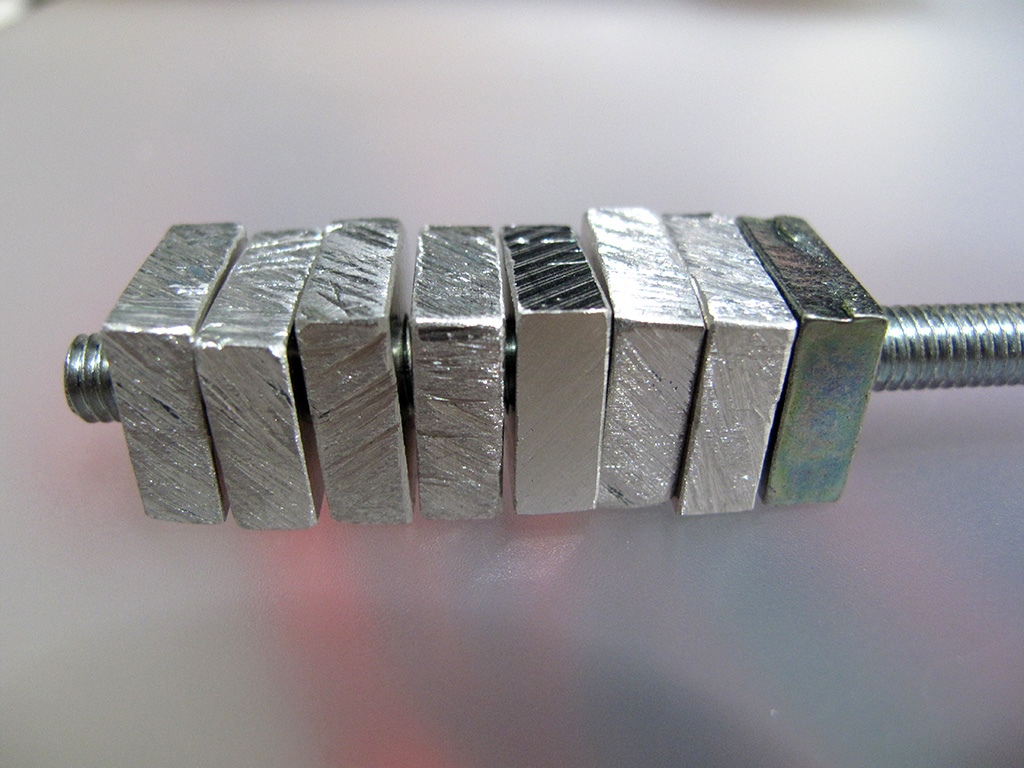
Nuts in the hole
They are very uneven, but should be fine for just fixing things on the milling machine 😉
Milling the case
I was finally ready to open holes on the case. I printed a sketch and put it on the case so that I can tell where to drill. This is helpful not only looking but also drilling precisely.
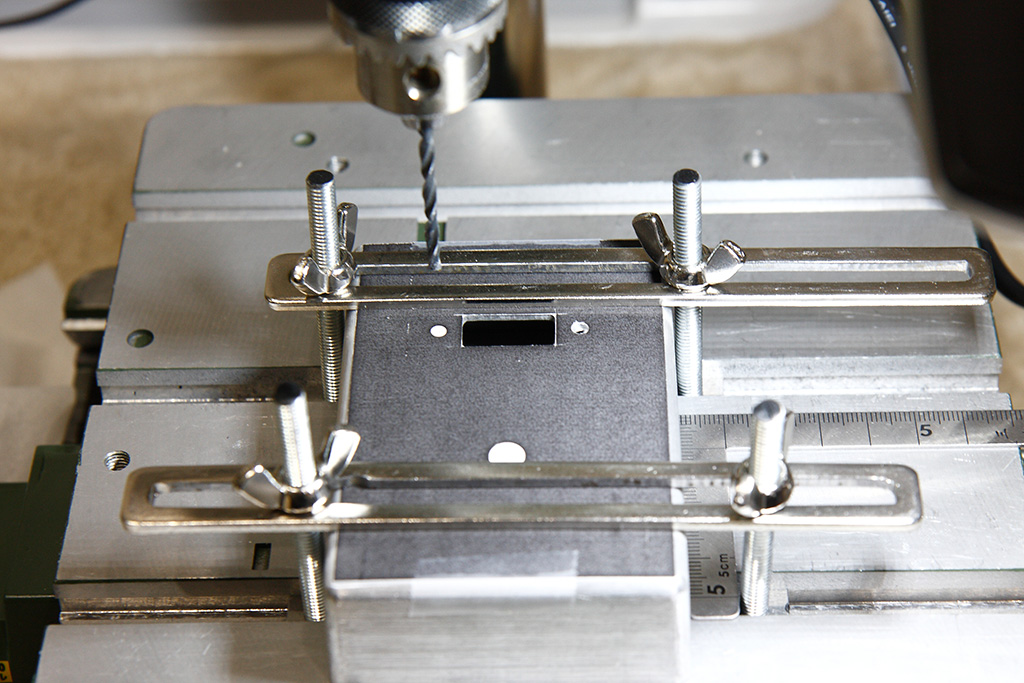
Opening holes
I had problem installing the board. AC(OUT) conflicts!
AC (OUT) and circuit board
I decided to move AC to another side. To fill in the hole, I used a Nikken putty.
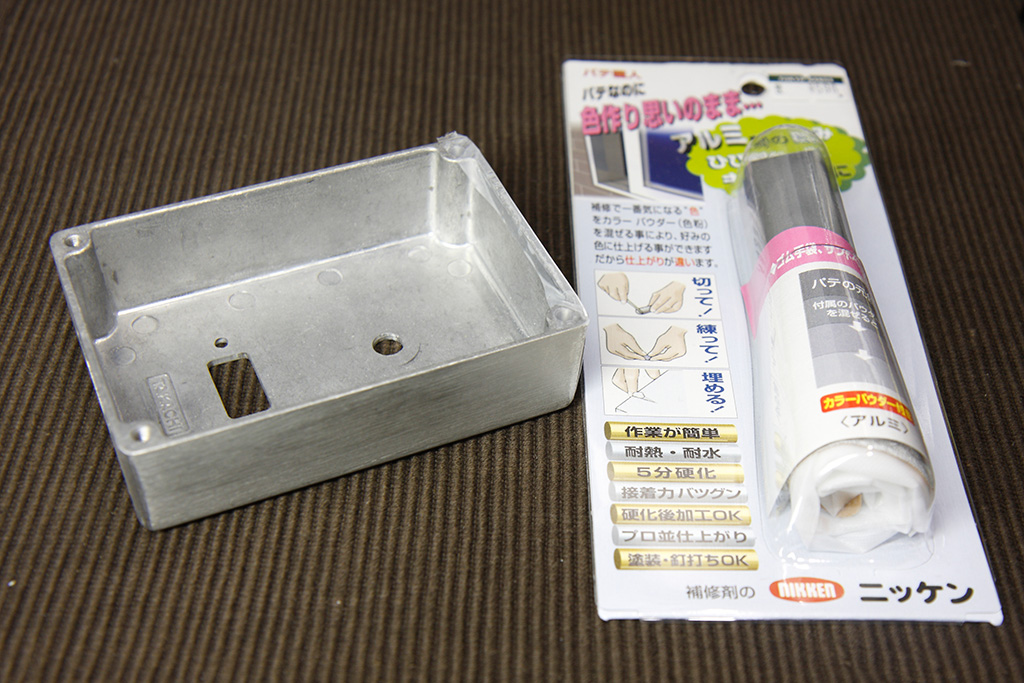
Putty
Putty is like clay, but it gets solid when it gets try.
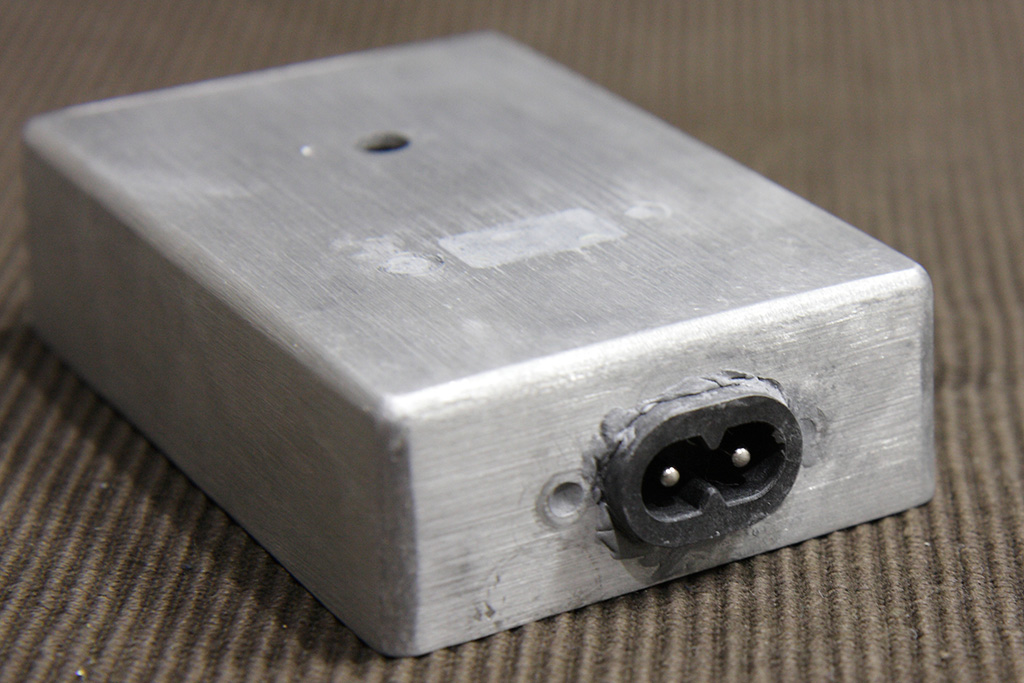
Putty after hardening
I filled in the hole and filed.
I fixed AC (IN) plug at the same time, but I couldn’t make it beautifully. It was hard to form with gloves. If I touch without gloves, the smell of putty remains for 2 or 3 days. The putty smells really bad!
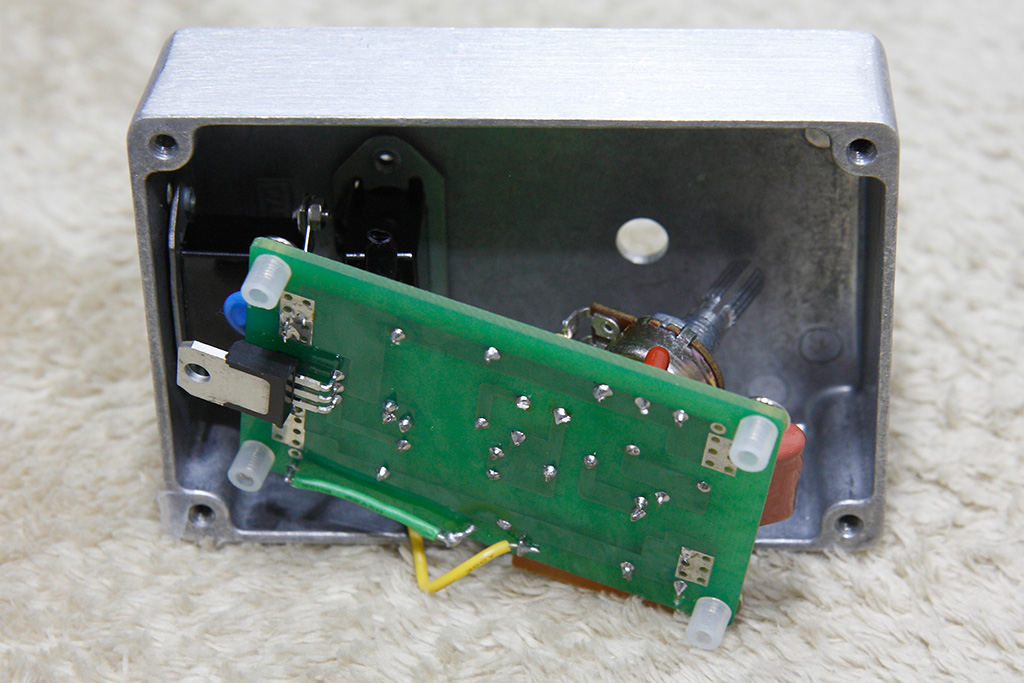
I thought I finally made it, but this time a capacitor (the brown one) and AC (OUT) conflicted.
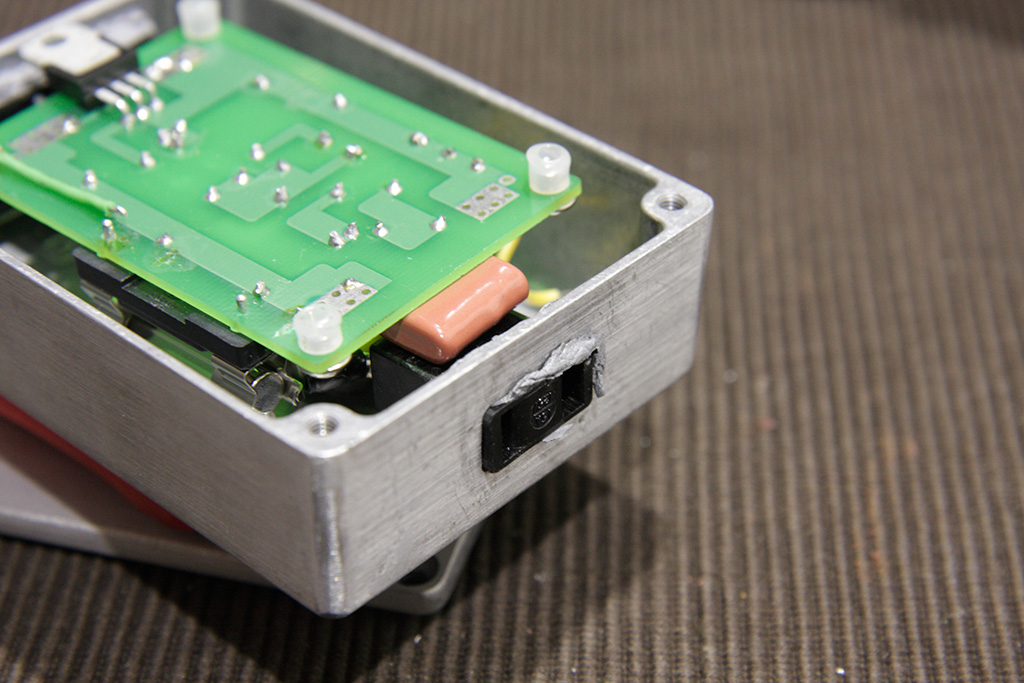
AC (OUT) and Capacitor
I unconnected the capacitor and reconnect with wires.
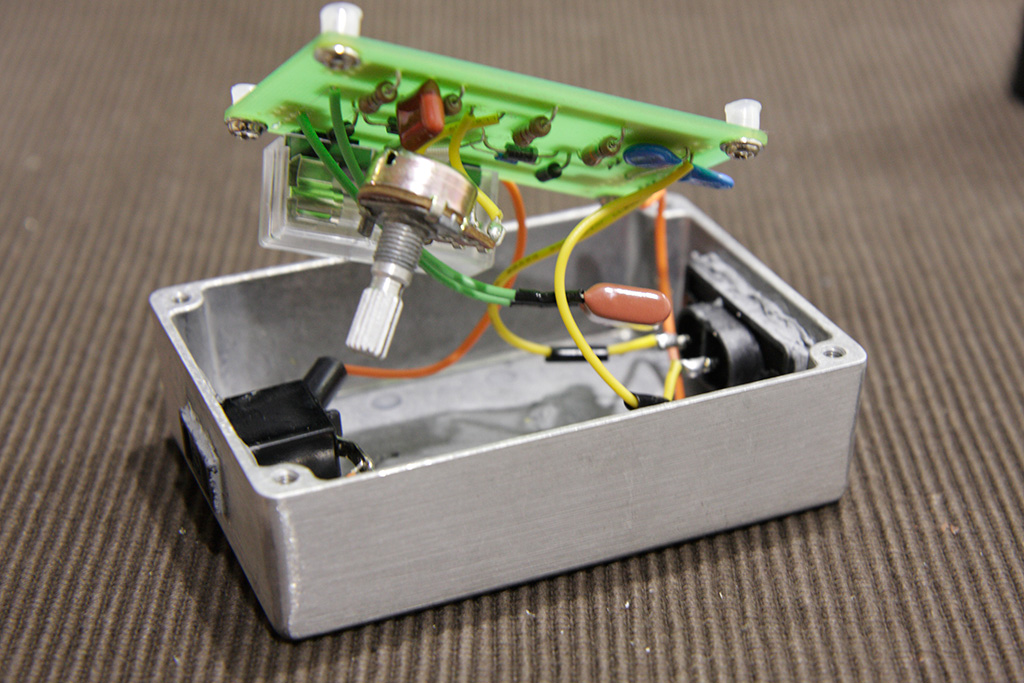
Avoiding confliction
I finally finished! It actually took about half a year since I bought this kit because I haven’t dreamed of processing metal. 😉
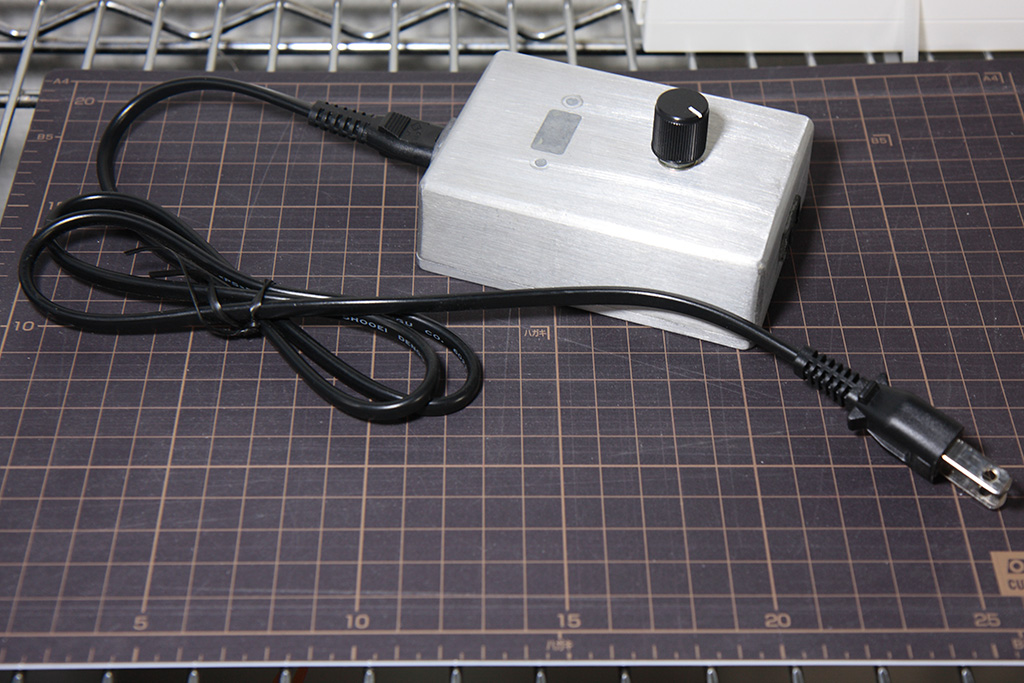
Dimmer
I said “this became an important tool for my DIY projects” in the beginning. These are what I can control.
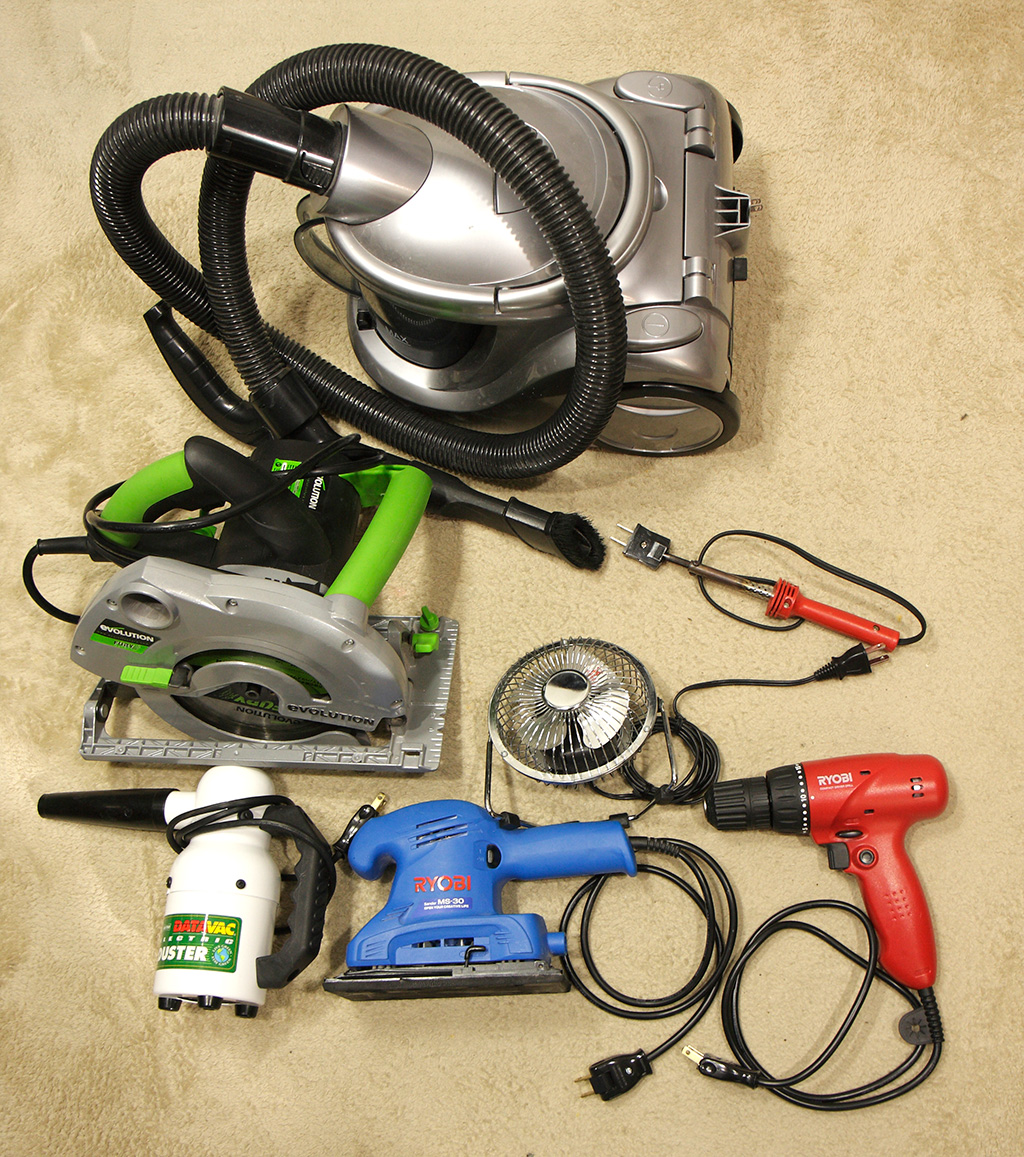
Tools dimmer can adjust poser
A vacuum cleaner, a circular saw, a fan, a soldering iron, an air cleaner, an electric sander, and a driver drill.
August 21, 2016 Update
I found something dimmer can’t handle with.
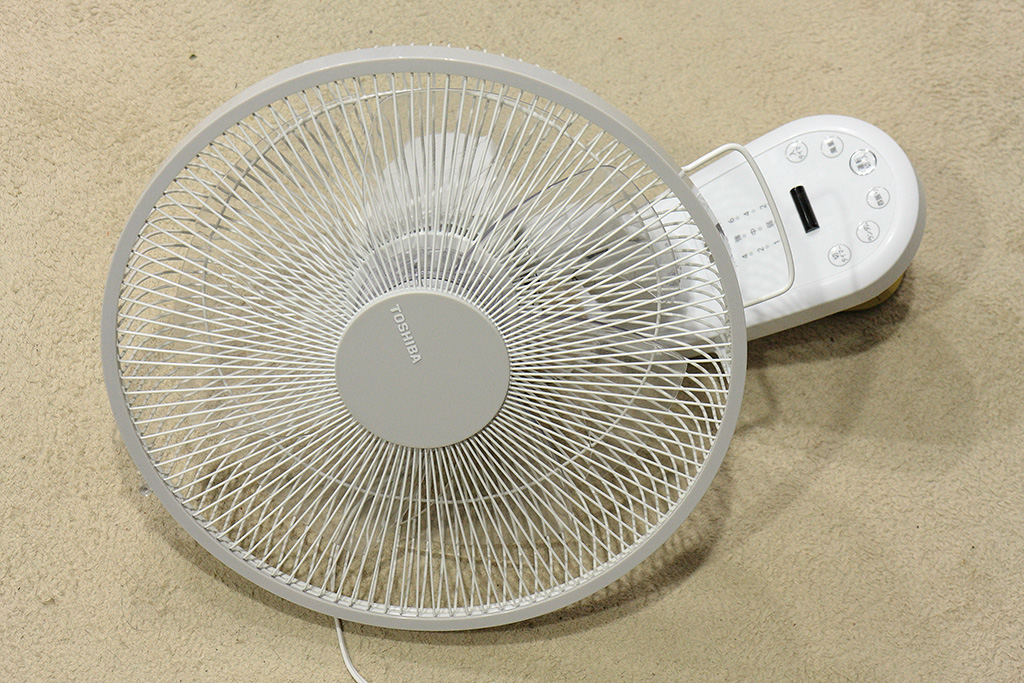
Fan with microcontroller
The dimmer could control the rotation slower, so I left them for one night. And then the fan broke in the morning. The power button won’t work. There was no bad smell or noise.
I put PWM by using Raspberry Pi where the internal IC chip (microcontroller) supposed to do, the fan worked. This means the IC chip was broken.
Fans without microcontroller won’t break. You can tell this kind of fan by switches and a timer knob that are prominent.
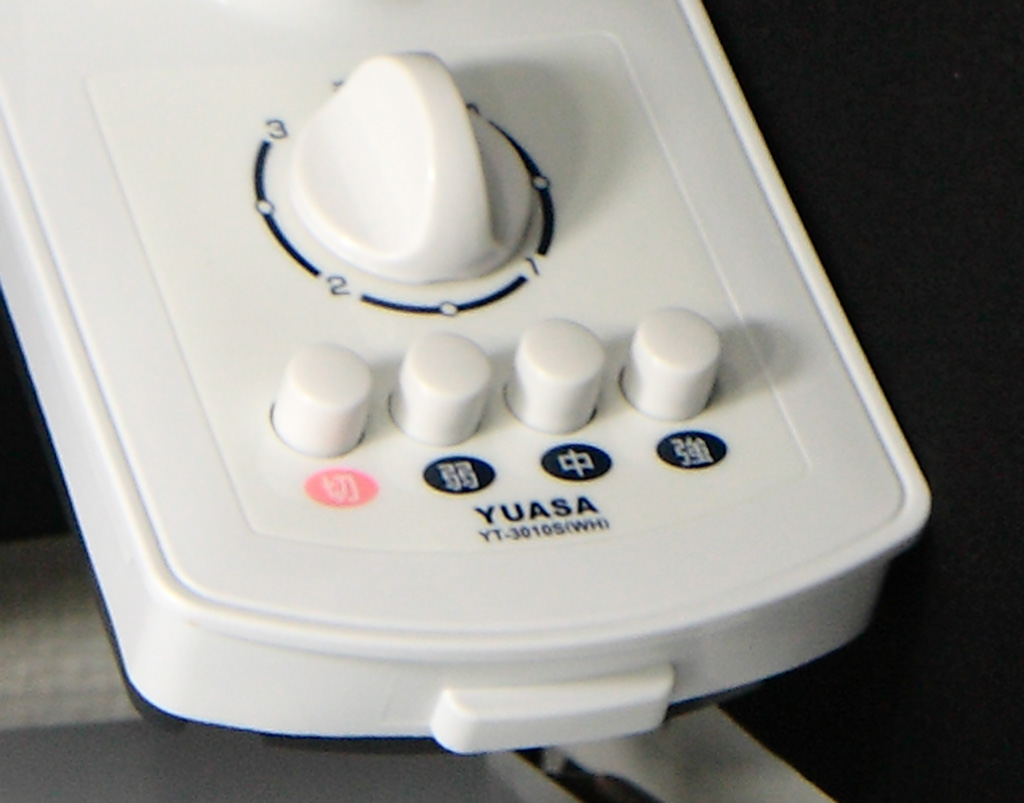
YUASA fan
Postscript ends.
By the way, most LED lights have sign saying “Not for use with dimmer”.
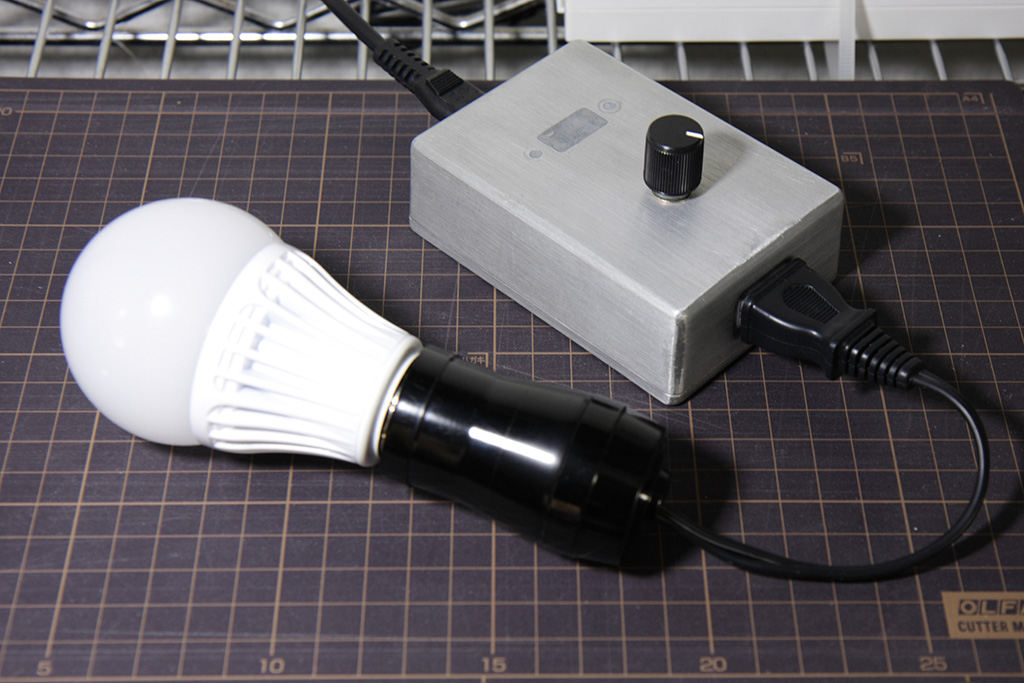
Dimmer and LED bulb
I experimented because I was curious. This is an OHM LDA9N-G.
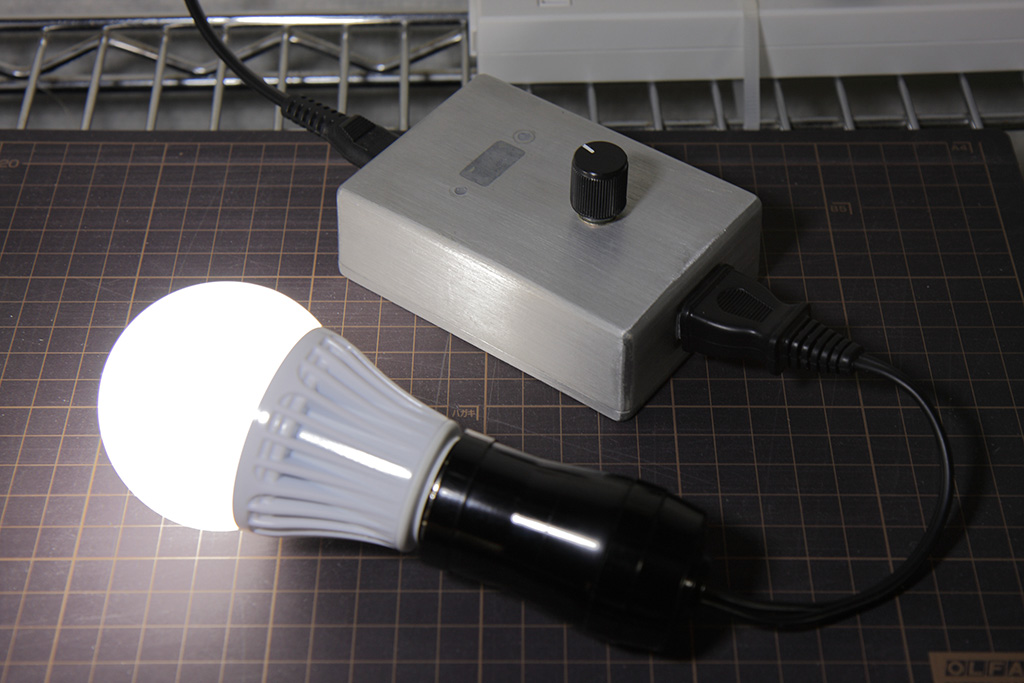
Dimmer and LED bulb
The lamp works fine on 100%. I think there is no problem on 100% on own risk. As I power down, the lamp started to flash. It was very rapid. The picture was taken on 50%, but because the shutter speed was slow, the lamp looks fine.
This phenomenon can be explained by how the dimmer works that I told first. I think the lamp continues this on 50% output for 50 times a second.
On for 0.005 second
Off for 0.005 second
On for 0.005 second
Off for 0.005 second
If you are interested in this post, check all posts of Raspberry Pi and Electronics DIY. For example, I posted these articles.
- A total beginner started to learn electronics with Raspberry Pi
A cigarette-box-size computer Raspberry Pi “bridged” between my knowledge of computer science and electronics. More precisely, RasPi made me one of zombies that crowd around circuit boards and connectors. LOL
- Electronics with Raspberry Pi Vol. 2
I couldn’t understand what current, resistance and voltage meant, but having spent money (aka investment 😉 ), I’m getting to understand what they mean.
- Tools I bought besides Raspberry Pi
4 months have passed since I got a RasPi and started to learn electronics. As I study, I needed to buy many things including books, electronic parts and tools. Today I show you what tools I’ve bought besides RasPi.
This post is also available in: Japanese
Leave a Reply to Brian Gold Cancel reply